FOOD

A Wino’s Guide to Holiday Wines

Holiday Office Party
You don’t have to skimp on quality when buying in quantity for the office party. Caposaldo Prosecco is an inexpensive, Italian sparkling wine that will pair wonderfully with a variety of party finger foods. Alcohol Level: 11.5% Suggested Retail Price: $15Gifting the Boss
It’s never a bad idea to suck up to the boss. Tenuta San Guido Sassicaia is the wine that put Italian wine on the wine collector’s map. It’s a trophy wine that can be cellared for decades. Yes, this one is pricey, so if your boss is not one to appreciate a great wine buy him/her a case of Boone’s Farm, otherwise consider it an investment in job security. Alcohol Level: 12.5% Suggested Retail Price: $220Christmas Eve Family Dinner
Christmas trees, gingerbread houses, and ugly sweaters – American traditions call for America’s most popular native varietal: Zinfandel. St. Francis “Old Vines” Zinfandel has concentrated flavors of black cherry and pepper that pairs perfectly with traditional holiday dishes. This dark red will also match that festive sweater should Uncle Billy get a little carried away during the pour. Alcohol Level: 15.5% Suggested Retail Price: $23Grown-Up New Year’s Dinner Party
You’ve graduated from quantity to quality. It’s now time to break out the white Burgundy, aka the other Chardonnay. Louis Jadot Meursault is a lovely Old World Chardonnay from the Côte de Beaune – where Burgundy’s most exquisite dry white wines are produced. Louis Jadot Meursault has stone fruit, floral, hazelnut and spice flavors and pairs wonderfully with seafood or poultry dishes. Alcohol Level: 13% Suggested Retail Price: $44Christmas Wine Fantasy
If anybody is in good with Santa, tell him I want a bottle of Taylor Fladgate Scion. Made in 1855, before sap-sucking insects (Phylloxera) destroyed most vineyards in Europe, this very old and rare port wine is a passport to time travel. It’s old, it’s rare (only two casks of it were found in 2010) and it will only get better with age. Yes, it is a fantasy, but I haven’t been on Santa’s naughty list for a long time so that should count for something right? Alcohol Level: 21% Suggested Retail Price: $3,200Which wines would you add to this list?
Disclosure: I’m not a sommelier or even a wine snob. I’m just a regular guy who loves wine. I frequently participate in food and wine chats on Twitter where I share what I like and I learn from others what they like. From time to time winemakers and marketers will send me a bottle of wine to review. If I like it, I’ll tweet about it and possibly even write a blog post about it. If I don’t, you’ll never see it mentioned. I am not paid to review wines. The wine I am sent is my only compensation.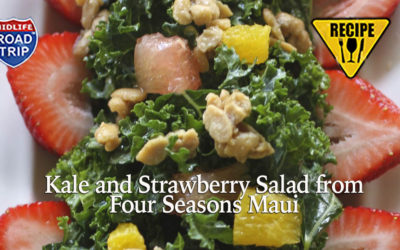
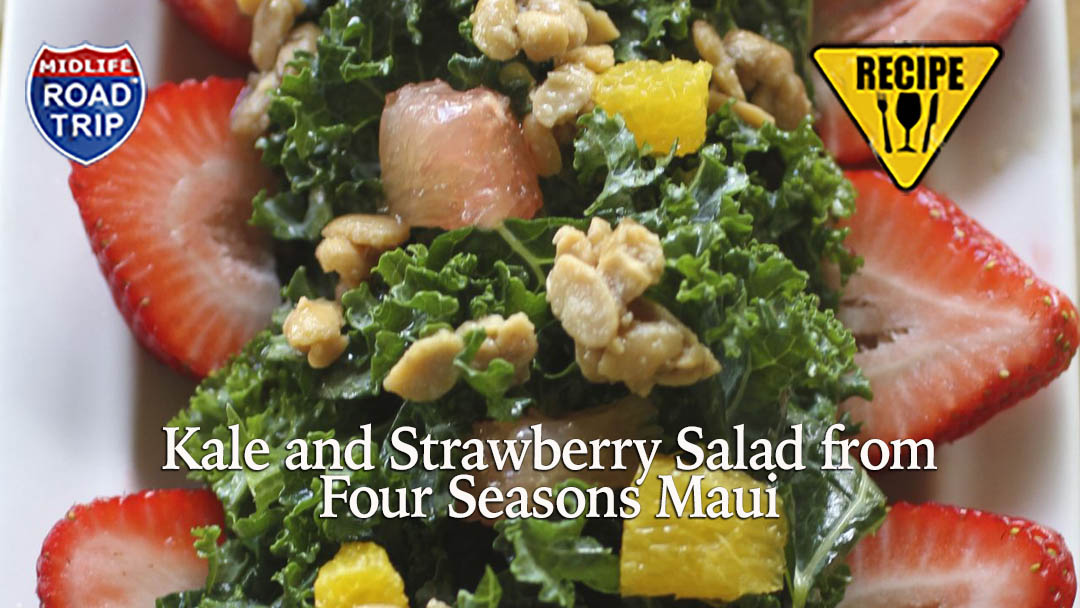
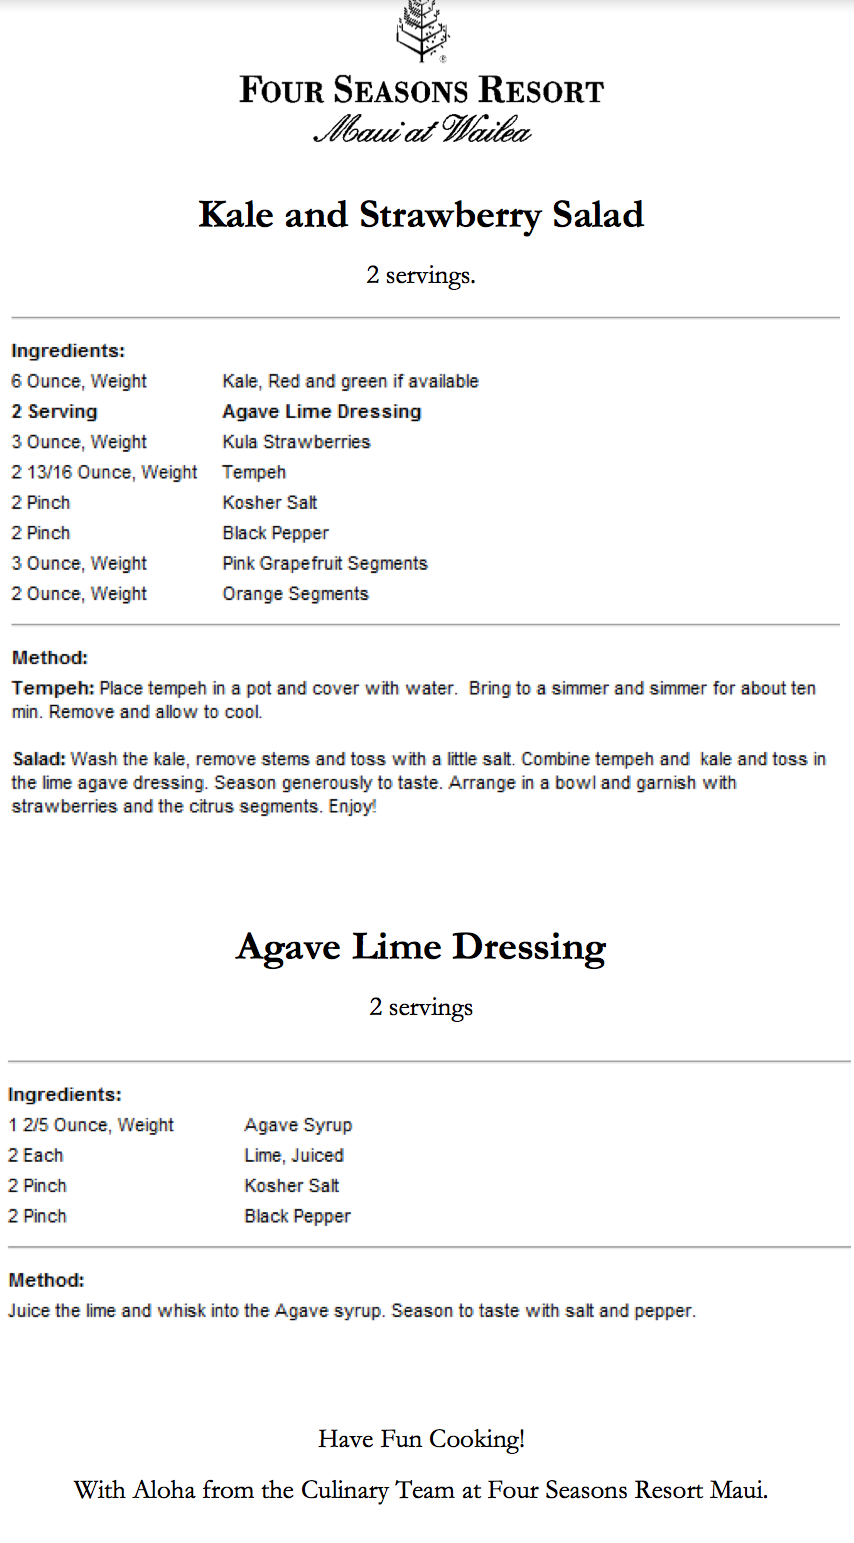
Kale and Strawberry Salad from @FSMaui #Recipe #PictureMaui
When we travel our souvenirs are our memories. And recipes. We collect recipes. We like to bring back some of the flavors of places we have been to recreate the experience long after we are home.
On a recent trip to Maui with the Expedia Viewfinders, we had the pleasure to lunch at Ferraro’s at the Four Seasons, Wailea’s only beachside open-air restaurant. A spectacular view, gentle trade winds, bright blue skies and the incomparable Four Seasons hospitality made for a memorable meal.
 So, as we often do, we asked chef Craig Dryhurst if he would share a recipe with us. This Kale and Strawberry Salad is refreshing, healthy and finished with an agave lime dressing that will have us “Picture Maui” every time we make it! Hope you enjoy it as much us we do. Let us know what you think!
Oh, and by the way, kale has a lot of health benefits!

Rachel Gaffney’s Real Ireland

It’s no secret that going to Ireland is on our Bucket List! Seeing Rachel Gaffney’s REAL Ireland however, is on the very TOP of that list! You may have seen her in Gourmet, Martha Stewart Living or in syndication on Hulu, ATT Uverse, AOL, and foodie sites such as iFood. However, her passion and her love for her homeland of Ireland really takes center stage in conversation, the stories she shares, the mouth watering recipes she prepares and her vast knowledge of all things Irish.
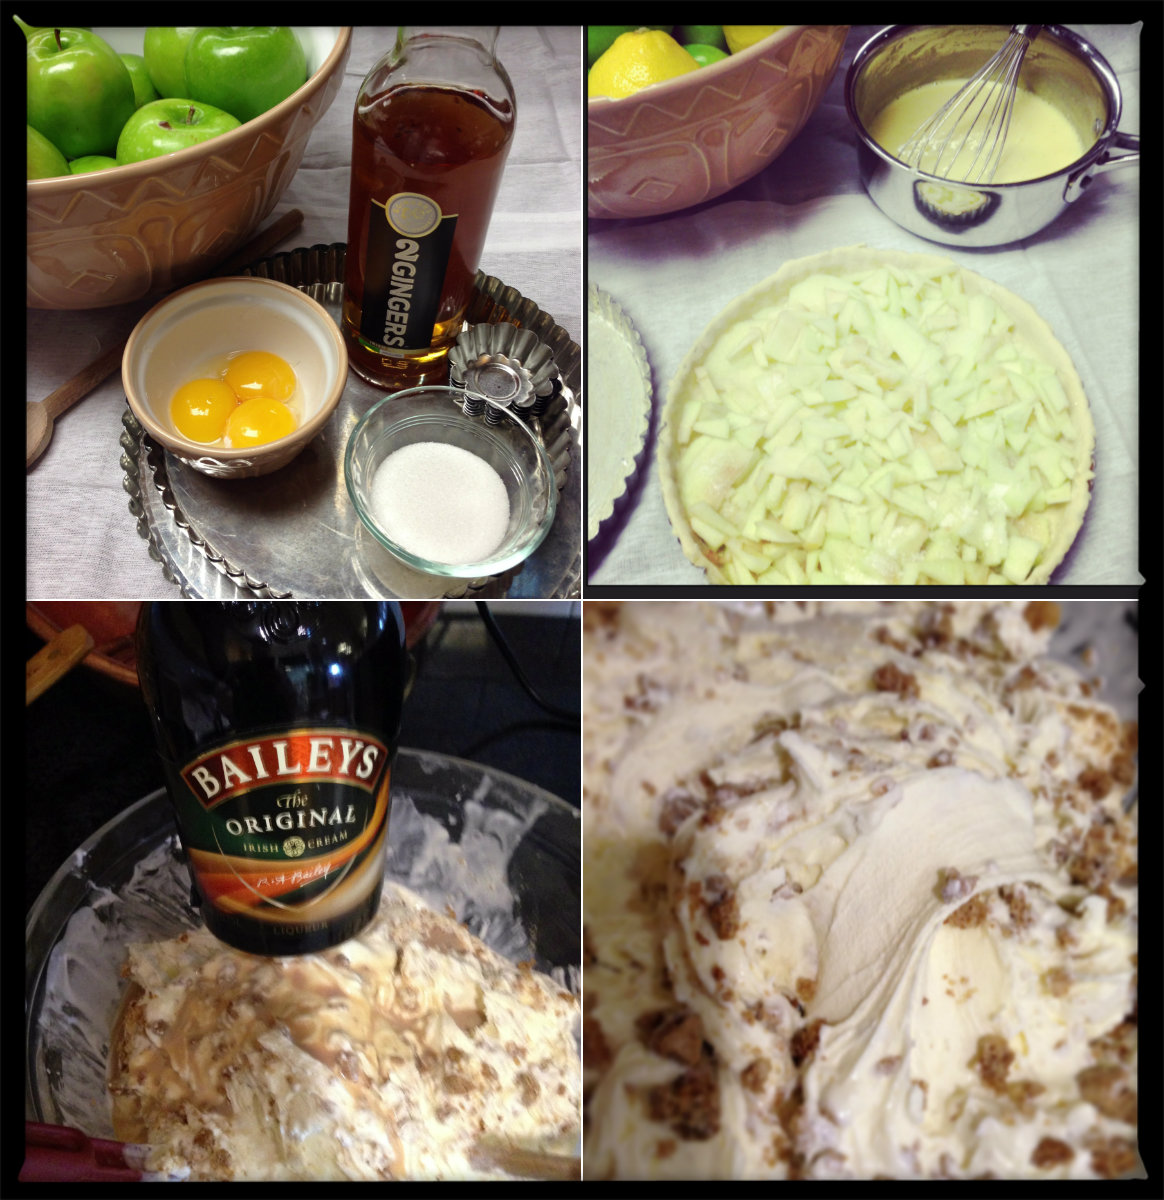
By way of County Cork, now living in Texas, Rachel epitomizes the traditional-meets-contemporary approach to Irish recipes and foods shared by The Irish Kitchen. We’re excited to share a couple of her favorite recipes (and surely to be ours) for Apple Irish Whiskey Tarts with a side of Homemade Brown Bread Ice Cream.
APPLE & IRISH WHISKEY TARTS
Pastry
- 6 Tblsp cold unsalted Kerrygold Pure Irish Butter, cut into 1/2 inch chunks
- 1 cup all purpose flour
- 1/4 tsp salt
- 3 to 5 teaspoons iced water
In a food processor, whirl together flour and salt. Add butter, pulsing until the mixture resembles coarse meal. Add water 1 teaspoon at a time, process just until dough clumps together and begins to form a ball.
It is best to make this pastry in advance to allow it to rest. Keep in a plastic bag in the refrigerator for at least 30 minutes. Make sure to wait until the pastry is at room temperature before rolling out.
Filling
- 4 large granny smith apples , peeled and diced
- 2 Tblsp sugar
- 1 cup heavy whipping cream
- 3 egg yolks
- 4 Tblsp sugar
- 1 Tblsp Irish whiskey
Preheat oven to 400°F
Begin by preparing your tart tins. Lightly butter each one, dust with flour and remove any excess flour. Set tins aside.
Line four individual tart tins with the pastry. Then add the apple and 2 tablespoons of sugar to sweeten. In a small saucepan warm the cream.
Beat the egg yolks and 4 tablespoons of sugar together. Stir in the cream and whiskey. Divide the cream mixture into each tart. Bake tarts for 25-35 minutes.
BROWN BREAD ICE CREAM
ICE CREAM
- 1 cup milk
- 1/2 cup sugar
- 2 eggs
- 2 cups heavy whipping cream
- 2 cups brown bread crumbs
- 1/2 cup soft brown sugar
Preheat oven to 425 degrees.
Combine bread crumbs and brown sugar together. Sprinkle on a baking sheet and bake in preheated oven for 10 minutes or until sugar has caramelized. Take care not to burn.
Remove from oven and cool.
Warm the milk in a small pan. In a separate bowl whisk the eggs and the sugar.
Slowly add the warm milk, making sure you continue to whisk.
Return the mixture back into the saucepan heating slowly and stirring until thickened, like a custard. It is important to not allow this to boil. Place the mixture in a bowl and allow it to cool.
Whip the cream until it has doubled in volume. Gently fold this into your cooled custard like mixture.
Next follow instructions for your ice cream maker.
Halfway through the process, gently add in your bread crumb mixture. Remove and freeze until read to serve.

Taco!! Taco! Taco! Recipes to Make Every Day Taco Tuesday

Recipe #1: BBQ Skirt Steak Tacos
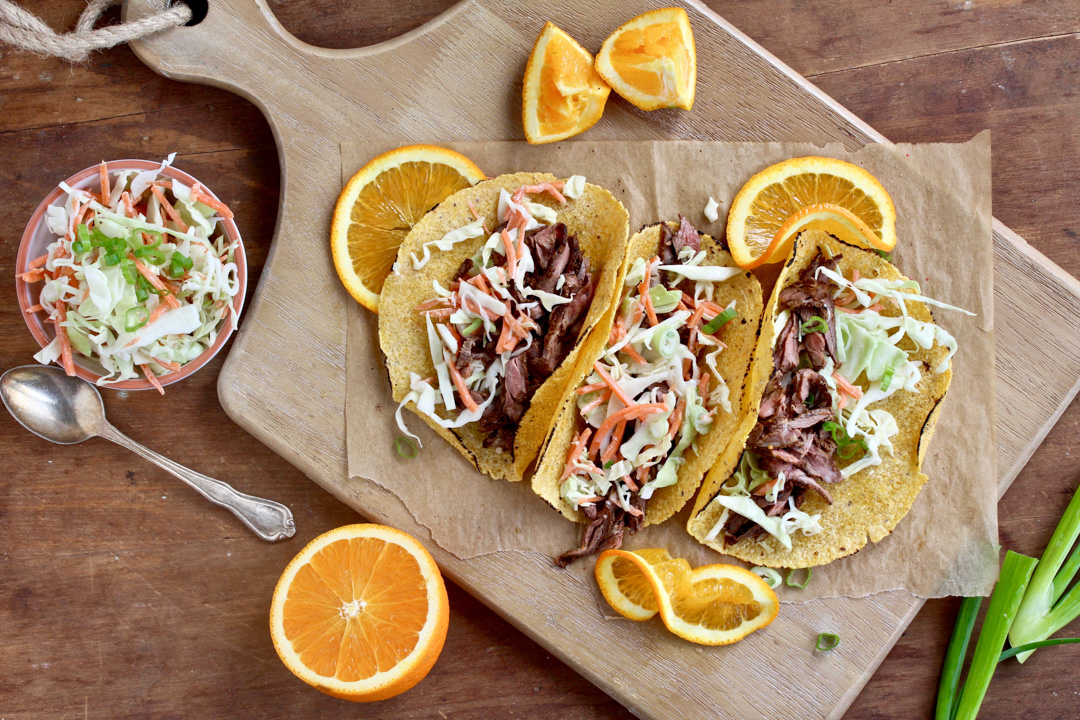
Servings: 4
Ingredients
8 flour tortillas, warmed
For the rub:
2 teaspoons ground cumin
1 teaspoon chili powder
1 tablespoon packed brown sugar
½ teaspoon kosher salt
½ teaspoon Hungarian paprika
¼ teaspoon ground cloves
1 pound skirt steak, trimmed
For the slaw:
2 tablespoons plain Greek yogurt
1 teaspoon apple cider vinegar
1 tablespoon fresh orange juice
2 medium carrots, shredded
2 cups shredded green cabbage
2 green onions, thinly sliced
⅛ teaspoon kosher salt
Directions
In a small bowl combine the cumin, chili powder, brown sugar, salt, paprika, and cloves for the rub. Rub steak all over with the spice mixture and let sit for 30 minutes or up to 1 hour in the fridge. Combine the yogurt, apple cider vinegar, and orange juice in a medium mixing bowl. Add the shredded carrot, cabbage, and green onion and toss to coat to complete the slaw. Season to taste with salt and black pepper. Cover and refrigerate until ready to serve. For the steak, preheat the grill to high heat or set a grill pan over medium-high heat. If using a grill, clean the grill grates and brush them with oil. If using a grill pan, coat pan lightly with oil. Once hot, add the steak and cook the steak for 4 to 5 minutes on each side, or until desired degree of doneness. Let steak rest 10 minutes. Slice against the grain and serve in warmed tortillas topped with slaw.
Recipe #2: Cumin Chickpea Tacos
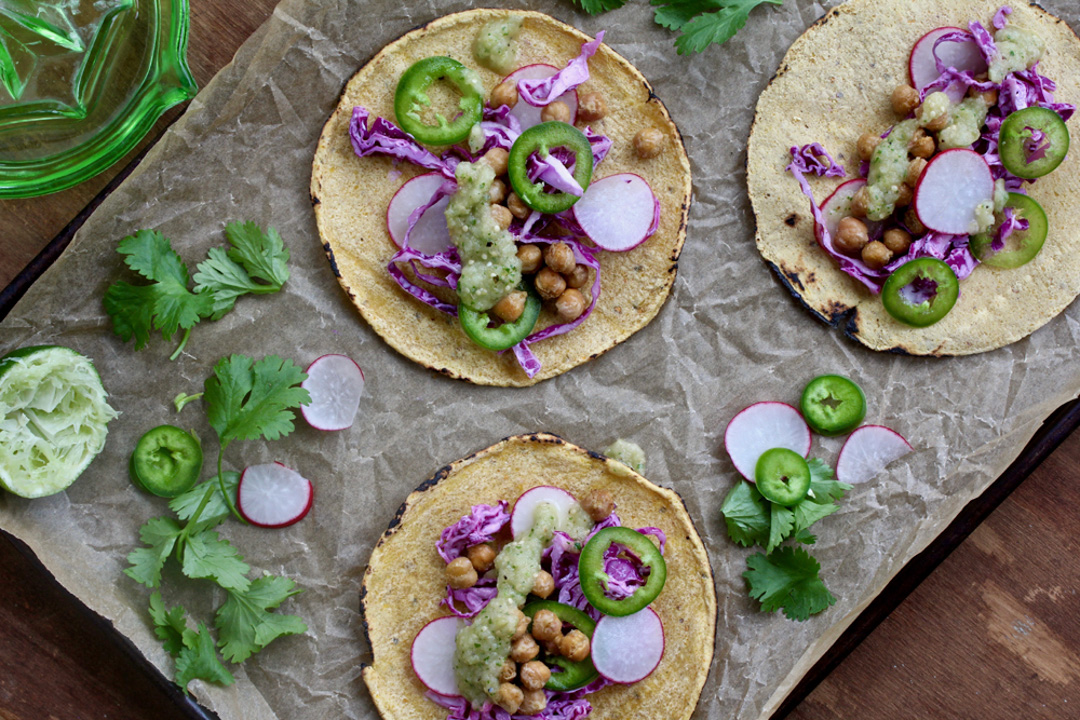
Servings: 8
Ingredients
16 (6-inch) corn tortillas, warmed
For the salsa:
1 pound tomatillos, skins removed and washed
1 small white onion, chopped
2 cloves garlic, skins removed
2 teaspoons extra-virgin olive oil
½ lime, juiced
¼ cup lightly packed cilantro
For the chickpeas:
1 (15.5-ounce) can chickpeas, drained, rinsed and patted dry
1 tablespoon extra-virgin olive oil
1 teaspoon ground cumin
¼ teaspoon kosher salt
1 teaspoon fresh lime juice
For the cabbage slaw:
¼ cup plain Greek yogurt
Zest and juice of 1 lime
¼ teaspoon kosher salt
½ head purple cabbage, thinly sliced
1 jalapeño, thinly sliced
Directions
Position oven rack about 6 inches from the heating element and preheat the broiler. Line a rimmed baking sheet or broiler pan with foil and coat with nonstick cooking spray. Quarter the tomatillos and add them to a bowl along with the onion, garlic, and olive oil. Toss to coat. Spread mixture out onto the prepared baking sheet. Broil 4 minutes, stir, then broil 2 more minutes. Stir again and broil an additional 2 minutes, or until tomatillos and onion are blistered and browned. Remove and cool slightly before transferring to a blender or the bowl of a food processor. Add the lime juice and cilantro and puree until smooth to complete the salsa. Season with salt to taste, if desired. Set a large, non-stick pan over medium-high heat and add the oil. Add the chickpeas and cook, stirring often, until toasted, about 2 to 3 minutes. Add the cumin and cook 1 more minute. Remove from heat and stir in the salt and lime juice. Combine the yogurt, lime juice, zest, and salt in the bottom of a mixing bowl. Add the cabbage and jalapeño and toss to combine to finish the slaw. Serve chickpeas in warmed tortillas, then top with salsa and cabbage slaw.

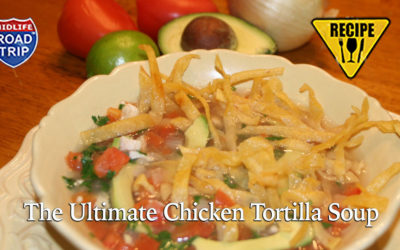
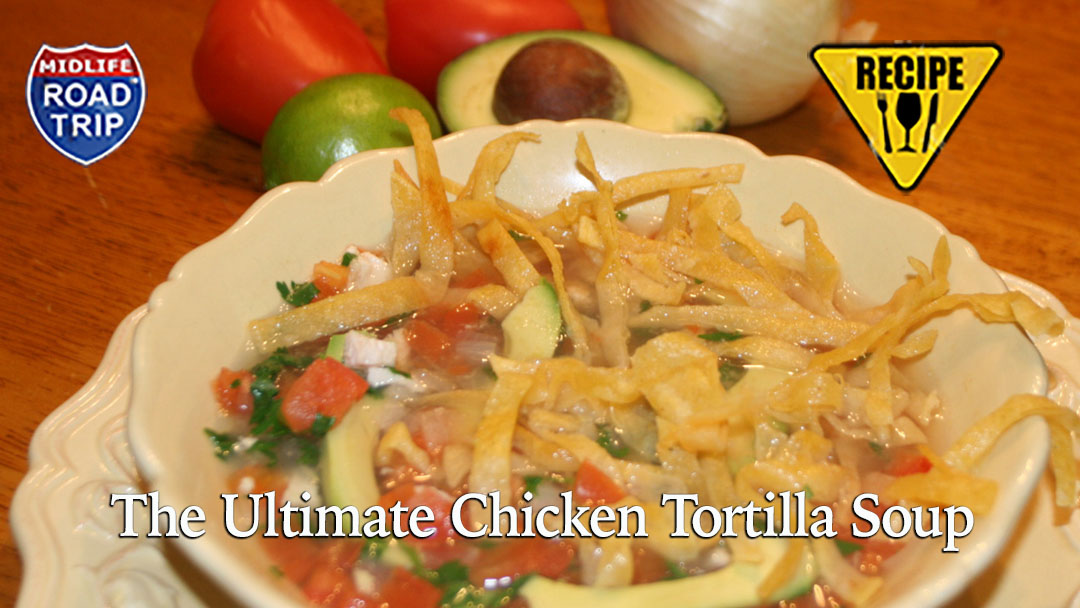
The Ultimate Chicken Tortilla Soup Recipe
When I was growing up, my mother would always make me eat a bowl of chicken soup whenever I was sick. She would open a can, heat it on the stovetop and serve it to me with saltine crackers. I can’t remember if the soup ever made me feel better or not and I don’t recall it being particularly good. I just know that I always associated chicken soup with being sick.
As a result, I always viewed chicken soup as more of a medicine than as a food to be enjoyed.
Until I became the Foursquare Mayor of a Mexican restaurant.
When El Ranchero opened up just a few blocks from our house, it became our go-to place to eat whenever we didn’t feel like cooking. We probably eat there about twice a week (when I’m in town).
Several years ago, I was suffering from a sinus infection and a scratchy throat. I really didn’t have much of an appetite but I knew I needed something to eat, so for the first time, I ordered El Ranchero’s chicken tortilla soup. It was the best soup I had ever eaten! I can’t say if the soup had any healing properties, but I can say that it was memorable enough that I wanted it again.
Being a foodie, I felt compelled to experiment at home with the ingredients that I thought was in the soup so I could make it for myself. After a few tries, I finally perfected it. In fact, I like my version a little better than El Ranchero’s (please don’t tell ‘em). Now it has become one of our go-to dishes for entertaining, watching football, and of course, for any time we’re feeling under the weather.
INGREDIENTS
2 chicken breasts
2 quarts of chicken broth
1 chicken foot (optional – for good luck)
4 diced tomatoes
2 diced onions
2 diced jalapenos (optional – for extra heat)
4 limes
8 sprigs of fresh cilantro (chopped)
2 avocados (thinly sliced wedges)
4 corn tortillas
corn oil or canola oil
salt & pepper to taste
SOUP DIRECTIONS
- In a large pot, simmer the chicken breast in the chicken broth for about 5 minutes
- Remove the breast from the broth
- Reduce to medium heat, add tomatoes and onions & optional jalapenos
- Shred the chicken breasts and return to the pot
- Add salt, pepper and the juice of 4 limes
- Let the soup cook for about 20 minutes
- Top with cilantro and avocados
- Add tortilla to each individual serving to maintain some crunchiness
- Just for fun, I’ll sometimes throw in a chicken foot whenever we’re entertaining guest
Tortilla Strips Directions
- Slice tortillas into thin strips.
- Pan fry in canola or corn oil until crispy
- Remove and place on paper towel to absorb excess oil
- Salt to taste
What’s your favorite way to prepare chicken?

Valentine Vino

So Valentine’s Day is rapidly approaching and you need a Valentine vino to compliment the chocolates and roses, something that’s not too expensive, something to win points in the romance department. Think red!
I’m playing it safe and going with one of my favorite wines reviewed last year – Apothic Red, a full-bodied red blend of Zinfandel, Merlot, Cabernet Sauvignon, and Syrah. It has an intense dark fruit flavor with hints of mocha and vanilla.
At around $12 a bottle, Apothic Red is my Can’t-go-wrong recommendation for toasting Valentine’s Day. Cheers!
What’s your go-to wine for Valentine’s Day?
Disclosure: I’m not a sommelier or even a wine snob. I’m just a regular guy who loves wine. I frequently participate in food and wine chats on Twitter where I share what I like and I learn from others what they like. From time to time winemakers and marketers will send me a bottle of wine to review. If I like it, I’ll tweet about it and possibly even write a blog post about it. If I don’t, you’ll never see it mentioned. I am not paid to review wines. The wine I am sent is my only compensation.


Martina McBride’s Blackberry-Bacon Grilled Cheese Sandwich
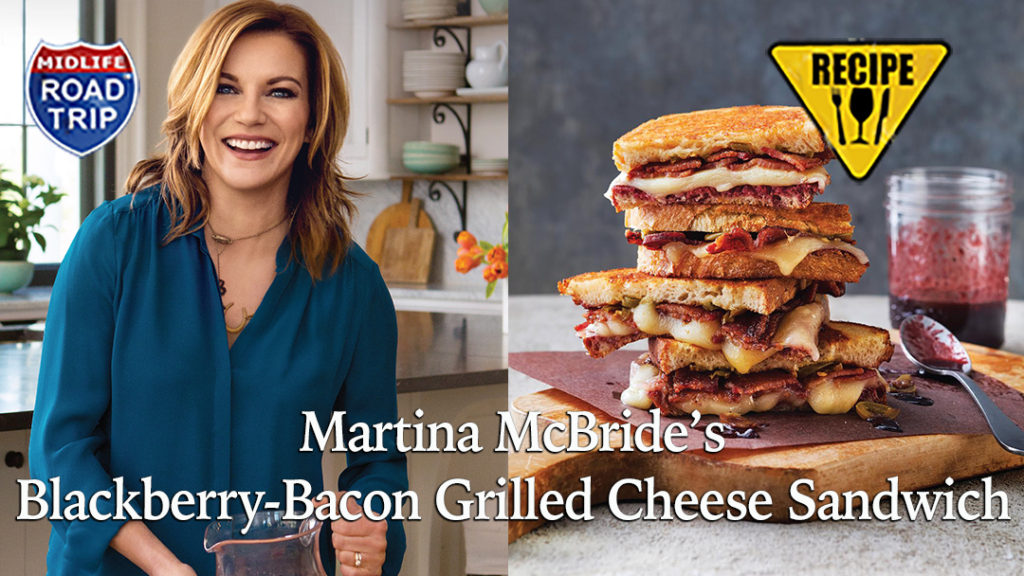
To know us is to know bacon and cheese are two of our very favorite things. Martina McBride’s Martina’s Kitchen Mix cookbook kicks the beloved Bacon Grilled Cheese Sandwich up a notch with a hint of Blackberry Jam. It is a game changer.
“This is a delicious sweet-and-spicy version (one of my favorite flavor combinations) of a traditional grilled cheese sandwich. Crisp bacon—another fave—adds a smoky element to the combo.” Martina McBride
Serves 4 Hands-on 25 minutes Total 25 minutes
Ingredients
- 6 slices thick-cut bacon
- 2 tablespoons blackberry jam
- 2 teaspoons adobo sauce, from canned chipotle peppers in
adobo sauce - 4 tablespoons butter, softened
- 8 slices sourdough bread
- 4 slices Havarti cheese
- 1⁄4 cup pickled jalapeño slices
Directions
1. Cook the bacon in a large skillet over medium-high 8 to 9 minutes or until crisp; remove the bacon, and drain on paper towels.
2. Stir together the blackberry jam and adobo sauce. Spread the butter on 1 side of each bread slice. Place 4 bread slices, buttered sides down, on wax paper. Top with the blackberry jam mixture, cheese, bacon, and pickled jalapeño peppers; top with the remaining bread slices, buttered sides up.
3. Cook the sandwiches in a nonstick skillet or preheated
panini press over medium 2 to 3 minutes on each side or until golden brown and
the cheese is melted.
ad lib
You can change this up and experiment with it as much as you want. Use a different kind of cheese: Monterey Jack, Swiss . . . or pepper Jack, if you want it even spicier. I sometimes use raw jalapeños instead of the pickled kind for a bit of crunch and freshness. Shredded ham instead of bacon would be another good swap to turn this into a sweet-and-smoky, hot ham-and-cheese sandwich.
Check our Martina’s Slow-Cooker Chicken Tikka Masala recipe.
Recipe credit:
Excerpted from Martina’s Kitchen Mix by Martina McBride. Copyright © 2018 Oxmoor House. Reprinted with permission from TI Inc. Books, a division of Meredith Corporation. New York, NY. All rights reserved.
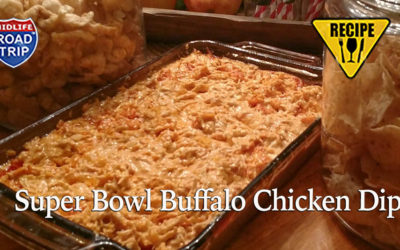
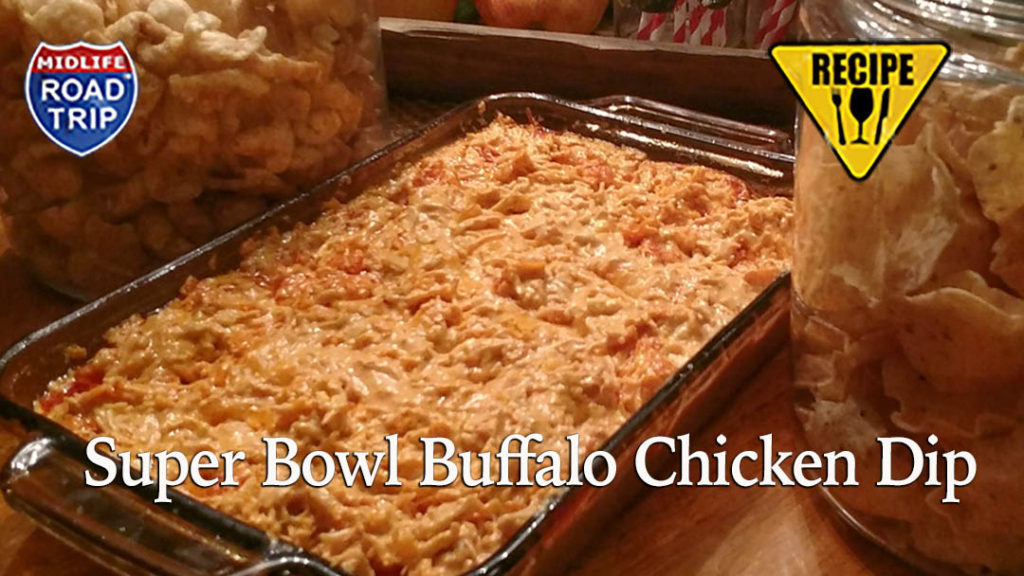
Super Bowl Buffalo Chicken Dip
After fattening myself up over the holidays, one of my perennial new year’s resolutions is to eat a healthier diet. I usually do pretty well sticking to it until the Super Bowl rolls around. I inevitably find myself at a party, watching the game, and succumbing to peer pressure by indulging in pizza, beer, whoopie pies, and football-shaped Cocoa Krispies treats.
For the last several months I have been on a self-imposed low-carb diet. Whenever I find myself in a party situation, I gravitate toward the low-carb food options.
While at a tailgate party earlier this year, I discovered a warm Buffalo Chicken Dip that was a perfect pairing for football festivities. I first tried a little of it on a stick of celery. And then on another stick of celery. Then I grabbed a bowl intended for chili and filled it with the Buffalo Chicken Dip. I was met with an “I can’t believe you just did that” glare from my wife when I returned from my seat. I justified my action by explaining that A) it was the only low-carb option at the table and B) I wasn’t eating anything else. Besides, what was I supposed to do once it was in my bowl, put it back?
Here’s my version of that delicious buffalo chicken dip. It’s sure to be a healthy hit at your Super Bowl party! …as long as you eat it with celery, carrots, or pork rinds. Friends who aren’t counting carbs will love it with crackers or nacho chips – especially the scoop-able kind of chips because they hold more.
Ingredients
8 Chicken tenderloins
2 packs cream cheese
2/3 bottle of chunky blue cheese salad dressing (or Ranch dressing – whichever you prefer with buffalo wings)
12 oz bottle of your favorite buffalo hot sauce
1 cup of your favorite shredded cheese
2 sliced jalapeño peppers (optional for extra heat)
Directions
- Boil tenderloins in water for about 10 minutes – set aside to cool
- Preheat oven to 350
- Combine the cream cheese, chunky blue cheese dressing, and hot sauce in a large mixing bowl
- Using a mixer, food processor, or fork, thoroughly mix ingredients together
- Add the chicken and continue mixing until chicken is thoroughly shredded.
- Fold in 3/4 cup of shredded cheese
- Transfer the mixture into a casserole dish
- Top with remaining cheese
- Bake in the oven for about 20 minutes or until the cheese has melted
- Stir and garnish the top of the dish with sliced jalapeños (if desired)
- Let cool for about 5 minutes before serving
- Eat, enjoy, and root for your team!
What’s your favorite dish to serve at a Super Bowl Party?

Yogurt Parfait: A Healthier Breakfast Option
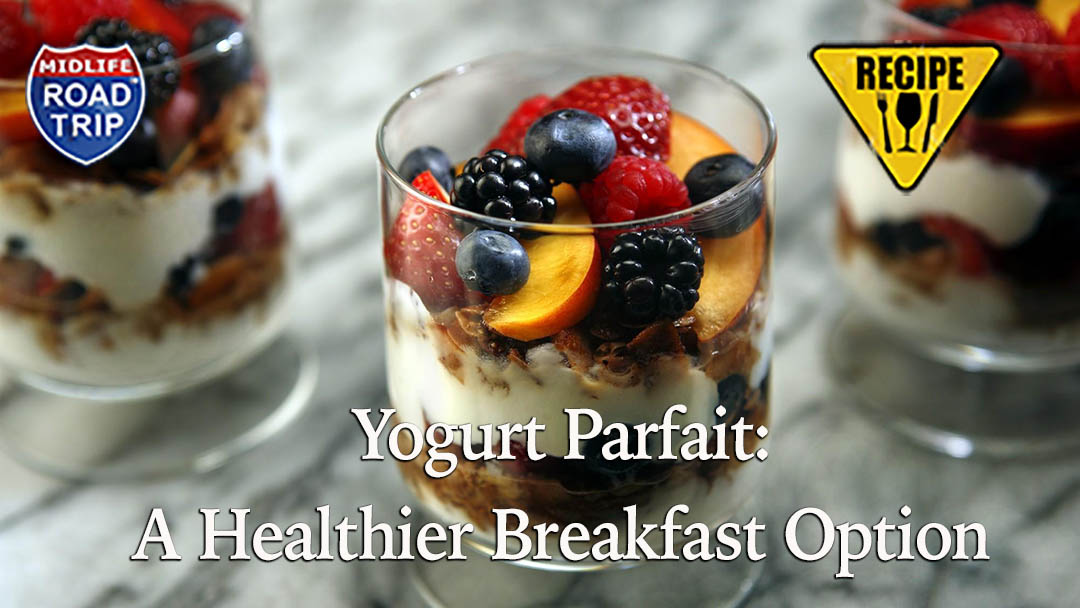
We see the inside of a lot of airports in our travels. Unfortunately, they don’t always offer healthy dining options. Nothing worse than sitting next to someone on a flight who has brought on an aromatic meal they picked up on the concourse on the way in. A yogurt parfait is a healthier less pungent alternative. This is our recipe for a refreshingly simple yogurt parfait
- Cooking Time: none
- Servings: 1
- Preparation Time: 5 minutes
- 6oz Greek yogurt
- 3 tablespoons of honey
- 1/2 lime
- 1 1/2 cups of fresh fruit (diced)
- 1/4 cup granola
DIRECTIONS
- In a small bowl whisk the juice of half of lime and honey together.
- Toss in diced fruit.
- Spoon half the yogurt in bottom of a stemmed glass.
- Spoon in half the Fruit mixture.
- Top with remaining yogurt.
- Spoon in remainder of fruit.
- Top with granola.
- You can make your own (we like the Alta Lodge recipe) or use your favorite store bought
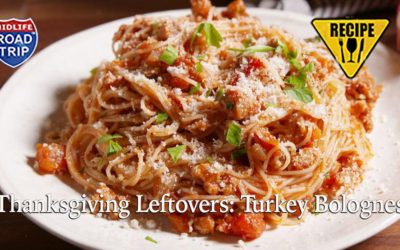
Thanksgiving Leftovers: Turkey Bolognese #Recipe
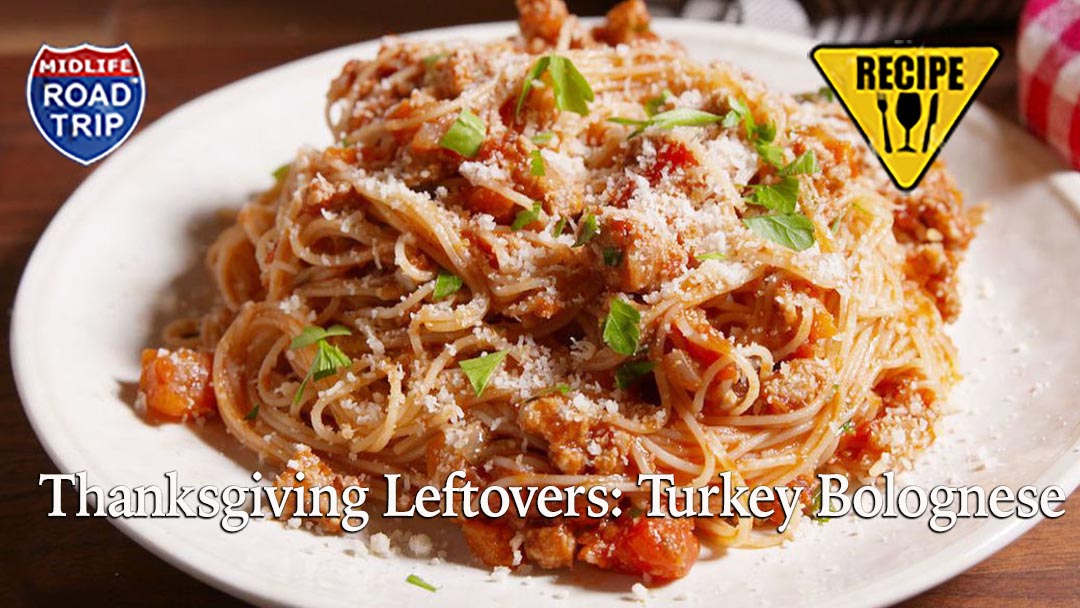
If you’re anything like me by the time Thanksgiving is said and done, I have had enough of the ‘fixins’ so I went in search of an un-turkey-like recipe and found a simple & quick one by Food Network‘s Giada De Laurentiis. Buon Appetito!
Recipe/Photo courtesy Giada De Laurentiis & Food Network
- Prep Time: 20 min
- Cook Time: 30 min
- Level: Easy
- Serves: 6 servings
Ingredients
- 1/4 cup extra-virgin olive oil
- 1 onion, chopped
- 4 garlic cloves, minced
- 1 carrot, peeled and finely chopped
- 1 celery stalk, finely chopped
- 1 pound shredded cooked turkey (preferably dark meat)
- 3 cups marinara sauce
- 1/4 cup chopped fresh basil leaves
- Salt and freshly ground black pepper
- 1 pound spaghetti
- Freshly grated Parmesan
Directions
Heat the oil in a heavy large frying pan over medium heat. Add the onion and garlic and saute until translucent, about 5 minutes. Add the carrot and celery and saute until the vegetables are tender – about 5 minutes. Add the turkey and saute 1 minute. Add the marinara sauce. Decrease the heat to medium-low and simmer gently for 15 minutes to allow the flavors to blend, stirring often. Stir in the basil. Season the sauce, to taste, with salt and pepper. (The sauce can be made 1 week ahead. Cool the sauce completely, then transfer it to a container and freeze for future use. Bring the sauce to a simmer before using.)
Meanwhile, cook the spaghetti in a large pot of boiling salted water until just tender but still firm to bite, stirring often – about 8 minutes. Drain, reserving 1 cup of the cooking liquid. Add the pasta to the sauce and toss to coat, adding enough reserved cooking liquid to moisten as needed. Serve with the Parmesan
Check out our Turkey a la King Recipe!
What’s your favorite thing to make with leftover turkey?
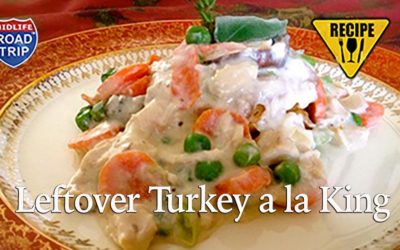
Leftover Turkey: Turkey a la King #Recipe
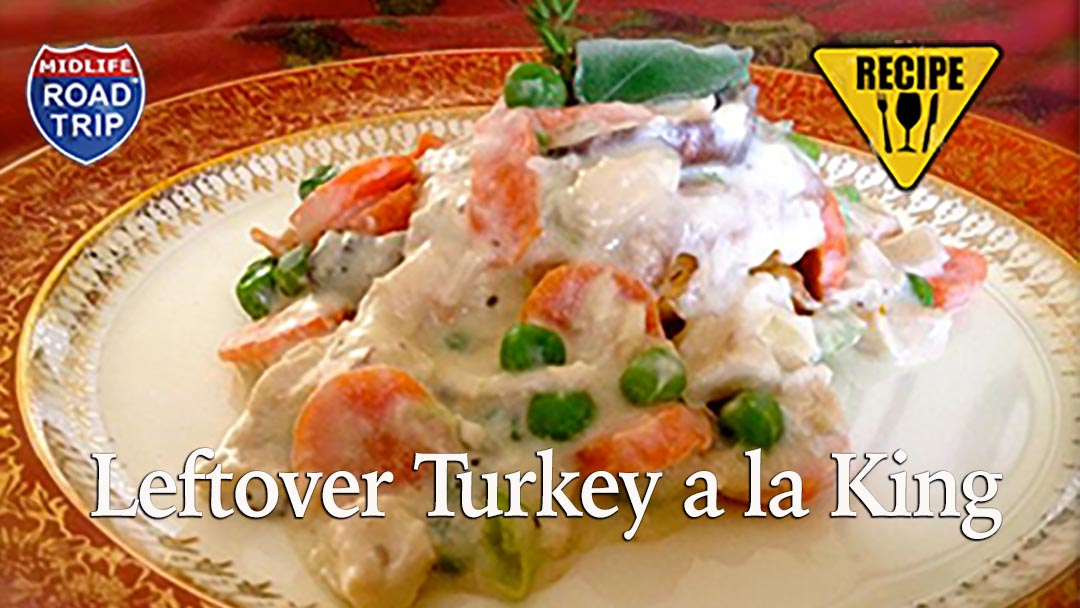

Turkey a la King
There are so many great dishes to make from Turkey leftovers it’s almost impossible to narrow it down to one. Turkey a la King is simple, filling and can be put together in minutes. It may be called Turkey a la King, but it’s fit for a Queen!

Ingredients
- Turkey
- Peas
- Carrots
- Celery
- Onions
- Mushrooms
- Milk
- Flour
- Butter
- Sage
- Thyme
- Puff Pastry Shells
- Salt & Pepper
White Sauce or Bechamel Sauce
Start by making a simple white sauce.
- 4 tablespoons unsalted butter
- 4 tablespoons flour
- 2 1/2 cups milk, heated (you can also use heavy cream or half & half) I used low fat half & half, because well, that’s all I had!
- Salt and Pepper to taste
- 1/4 tsp of nutmeg
- 1 fresh sage leaf
Melt the butter in a saucepan. Stir in the flour and stirring continuously, without letting it brown — about 2-4 minutes. Add the heated milk, and sage leaf, continuing to stir as the sauce thickens. Bring it to a low boil. Add salt and pepper to taste, lower the heat and continue stirring for 2 to 3 minutes more. Remove from the heat.

Turkey Mixture
- 2 cups diced leftover Turkey
- 1 cup of leftover carrots
- 1 cup of peas
- 1 cup of sliced mushrooms
- 3/4 cup finely chopped sweet onion
- 1/2 cup finely chopped celery
- 2 tablespoons butter
- salt and pepper to taste
- 1/2 teaspoon fresh thyme
- 1/4 cup chicken broth or turkey gravy

Turkey Mixture

Turkey a la King, Fit for a Queen
Check out all these mouth watering Sunday Supper recipes that you can make from your Thanksgiving Leftovers. Decisions, decisions! Which ones do we try first!
Breakfast & Brunch
Sweet Potato Cinnamon Rolls by Juanita’s Cocina
Turkey Cranberry Muffins by In the Kitchen with Audrey
Sweet Potato Biscuits by Home Cooking Memories
Main Course
Turkey Enchiladas by Webicurean
Thanksgiving Leftover Casserole by FamilyFoodie
Turkey and Cranberry Monte Cristo by Supper for a Steal
Thanksgiving hangover sandwich by Crispy Bits & Burt Ends
Turkey Tamale Pie by Dinners, Dishes, and Desserts
Thanksgiving Leftovers Pot Pie by I Run For Wine
Turkey and Stuffing Pasty by Small Wallet Big Appetite
The Ultimate Thanksgiving Leftovers Sandwich by Daily Dish Recipes
Turkey Vegetable Hash by Generation Y Foodie
Turkey Tetrazzini by That Skinny Chick Can Bake
Thanksgiving Leftovers: Turkey and Andouille Gumbo for #SundaySupper by Catholic Foodie
Red Potato Turkey Cutlets with Ginger & Fresh Herbs by Sue’s Nutrition Buzz
Thanksgiving Turkey Banh Mi Sandwich by 30AEats
Leftover Turkey and Sausage Gumbo by My Catholic Kitchen
Turkey Mornay Open-Face Sandwiches by The Weekend Gourmet
Leftover Mashed Potatoes and Beef Croquettes by Pippis in the Kitchen Again
Simple and easy! Turkey a la king, fit for a queen! by Midlife Road Trip
Turkey and Mushroom Risotto by Comfy Cuisine
Vegetarian Shepherd’s Pie by The Wimpy Vegetarian
Kartoffelpuffer – German Potato Pancakes by MrsMamaHen
Skillet Turkey Reuben by Cindy’s Recipes and Writings
# glutenfree Turkey Shepard’s Cake by Cooking Underwriter
Hearty Ham and Cheese Penne Pasta by Mama Mommy Mom
Hawaiian BBQ Turkey Flatbread Pizza by Damn Delicious
Turkey shepards pie! by The Realistic Nutritionist
Spicy Turkey Chili for #SundaySupper #Leftovers by Hot Curries and Cold Beer
Turkey & Cranberry Panini with Tarragon Aioli by The Messy Baker Blog
Learn How to Make Gravy in Quick Ways You’ll Love by Olivia Rose
Soups, Salads, Sides & Starters
Gluten Free Turkey and Dumplings by The Meltaways
Shaved Brussels Sprouts Salad with Shallots and Pancetta by Girl in the Little Red Kitchen
Curried Turkey Salad by Kimchi Mom
Potato Patties w/ Tomato Salsa by La Cocina De Leslie
Spicy Coconut Turkey Soup by Diabetic Foodie
Mashed Potatoes Twice Baked by Hezzi-D’s Books & Cooks
Moroccan Chicken Salad with Rice by My Trial’s in the Kitchen
Cranberry Barbecue Stuffed Sweet Potatoes by Cupcakes and Kale Chips
Olive Tapenade by Fast Food to Fresh Food
Leftover Turkey Soup by Bobbi’s Kozy Kitchen
Sweet Potato Bread Pudding by MarocMama
Sweets & Desserts
Cranberry Sauce Crumb Bars by girlichef
Pumpkin Gingersnap Truffles by Chocolate Moosey
Sweet Potato Spice Cake with Pecan Streusel Topping by Shockingly Delicious
Chocolate Peanut Butter Potato Frosting by Yummy Smells
What’s your favorite recipe for leftover turkey?

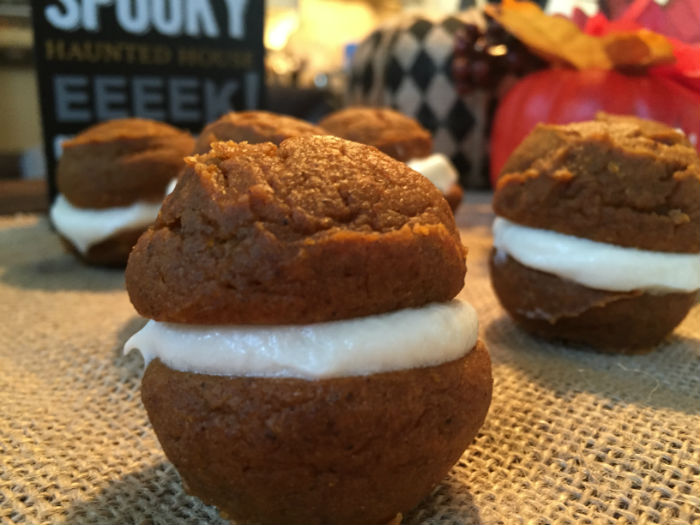
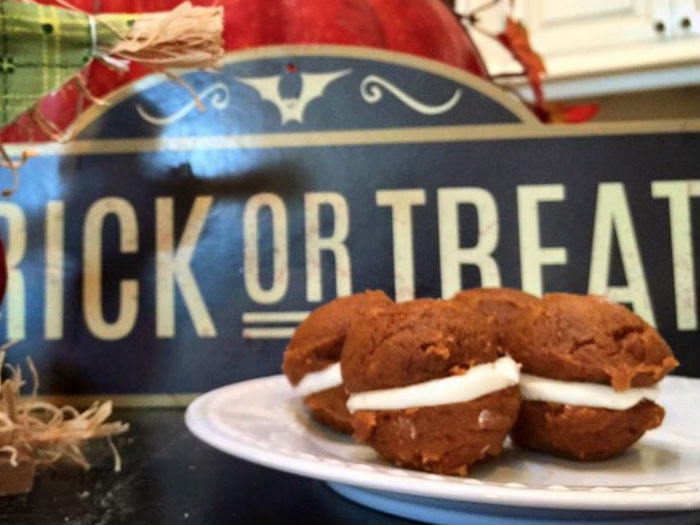
Pumpkin Whoopie Pies

The whoopie pie is not quite a cookie and not quite a cake. In fact, it seems to be the perfect marriage of the two. It is said to have been created by the Amish, it is the official state treat of Maine and there are even whoopie pie festivals. We’ve seen them often in our travels. So, I thought that fall and Halloween would be the ideal time to celebrate the whoopie pie, incorporating one of Autumn’s superstars, the pumpkin. These pumpkin whoopie pies have the perfect balance of sweet with a combination of pure cane and dark brown sugars, they have a hint of spice and a cream cheese filling that has just a whisper of maple, making it the perfect grown-up treat. Perfect for a Halloween party, an afternoon snack with a cup of tea, or served for dessert after Sunday Supper. Be sure and make plenty, they’ll be asking for seconds!
INGREDIENTS
PUMPKIN WHOOPIE PIES
- 3 cups all-purpose flour
- 3/4 teaspoon salt
- 1 teaspoon baking powder
- 1 teaspoon baking soda
- 2 tablespoons ground cinnamon
- 1/2 tablespoon ground nutmeg
- 1/2 tablespoon ground cloves
- 1 cup firmly packed Dixie Crystals dark-brown sugar
- 1 cup Dixie Crystals pure cane sugar
- 1 cup coconut oil
- 3 cups pumpkin puree, chilled
- 2 large eggs
- 1 teaspoon pure vanilla extract

CREAM-CHEESE FILLING WITH A HINT OF MAPLE
- 3 cups Dixie Crystals confectioners’ sugar
- 1/2 cup of unsalted butter, room temperature
- 8-ounce package of cream cheese, room temperature
- 1/2 teaspoon pure vanilla extract
- 1 teaspoon maple syrup

DIRECTIONS
- Prepare the whoopee pie mixture: Preheat oven to 350 degrees. Line baking sheets with a nonstick baking mat (love these).
- In a large bowl, mix flour, brown sugar, cane sugar, salt, baking powder, baking soda, cinnamon, nutmeg, and cloves; put to the side. In a separate bowl, mix, oil, vanilla, and eggs until blended. Add in pumpkin puree. Incorporate in flour mixture with wet ingredients until fully incorporated.
- With a small ice cream scoop (make sure it has a release mechanism) drop evenly rounded scoops of the pumpkin dough onto prepared baking sheets, about 1 inch apart. Put in the oven and bake until cookies are just starting to crack on top. Insert a toothpick into the center of each cookie it and when comes out clean (12 to 15 minutes) they’re done. Let them cool completely.
- Filling: Sift confectioner’ sugar into a bowl; set aside. Use an electric mixer (I couldn’t find my attachments so I used my vitamin and it worked great), beat butter until smooth. Slowly add in cream cheese and mix until well incorporated. Slowly add confectioners’ sugar and vanilla, and maple syrup (or maple extract for deeper mapper flavor) and beat just until smooth.
- Assembly: Put the cream cheese filling in a pastry bag and snip the end. Pipe a decent size dollop of filling onto cooled whoopie cakes (the flat side of half of the cookies). Sandwich together with remaining cookies, press down slightly so that the filling covers the cookie to the edge. Refrigerate cookies at least 30 minutes (an hour or two is even better) before serving. They last refrigerated up to 3 days.
Wishing y’all a HAPPY HALLOWEEN!

Disclosure: This post is sponsored by Dixie Crystals in conjunction with a social media campaign through Sunday Supper LLC. All opinions are my own.
![]()
Follow Dixie Crystals at:
Website Facebook Twitter Instagram Pinterest Google+
To get more great Sunday Supper Recipes, visit the website or check out the Pinterest board.
Halloween Treats
- Black Magic Caramel Apples by A Kitchen Hoor’s Adventures
- Black Velvet Spider Cake by Love and Confections
- Bloody Broken Glass Cupcakes by Run DMT
- Buttercup Squash Pie Bites by Magnolia Days
- Candy Bar Brownies by Desserts Required
- Candy Corn Fudge by Feeding Big
- Candy Corn Iced Sugar Cookies by Chocolate Chocolate and More
- Cauldron Cupcakes by Big Bear’s Wife
- Gluten Free Tombstone Treats by Gluten Free Crumbley
- Halloween Candy Brownies by Desserts Required
- Halloween House by Recipes Food and Cooking
- Halloween Pumpkin Coconut Bars by Lifestyle Food Artistry
- Homemade Candy Corn Marshmallow Treats by An Appealing Plan
- Jack o’ Lantern Cupcakes by Cosmopolitan Cornbread
- Mummy Chocolate Cupcakes by Family Foodie
- Pumpkin Bread Pudding by Recipe for Perfection
- Pumpkin Pie Puff Pastry Coffins by Ruffles & Truffles
- Pumpkin Spice Fudge by Runner’s Tales
- Pumpkin Whoopie Pies by Midlife Road Trip
- Spicy Little Devil’s Cupcakes by The Crumby Cupcake
- Spiderweb Brownies by Life Tastes Good
Plus Sweet Halloween Treats #SundaySupper with Dixie Crystals
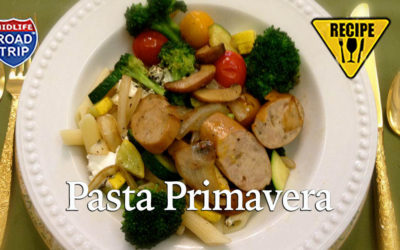
From Pasta Primavera to a Pasta Bar with all the Fixin’s in under 30 minutes
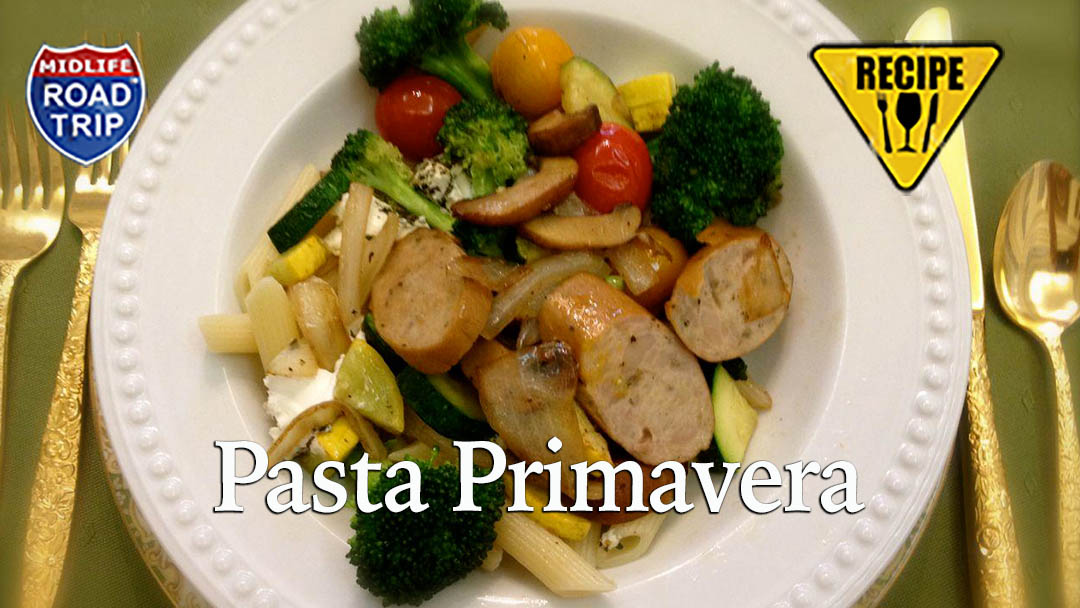 So how does one get from making a quick Pasta Primavera to a Pasta Bar with all the Fixin’s in under 30 minutes? When initially faced with the #SundaySupper challenge to create a quick, easy and flavorful dinner in under 30 minutes I settled on making Pasta Primavera, but as often happens in our house, no two people like the same thing. With that said, I quickly shifted gears and decided to do a Pasta Bar. Everyone could create their own meal in a matter of minutes. It was such a hit I think it’s going to be a regular in our dinner rotations!

I started at the local farmers market for a little inspiration. I decided on zucchini, yellow squash, sweet Vidalia onions, fresh spinach, Portabella mushrooms, red and yellow sweet cherry tomatoes, and broccoli.
We have a house full of meat eaters so I added chicken cutlets (leftover from the night before) and Applegate Organics Sweet Italian (Chicken & Turkey Sausage). What’s great about the Applegate Sausage is that it comes already fully cooked!
For tonight’s pasta bar, I went with Ziti as our pasta of choice but any pasta will work. And if there’s someone in your house who doesn’t like pasta you can substitute red potatoes cubed.
Next up is a variety of cheese. I had a choice of three, fresh mozzarella, parmesan, and herb goat cheese. Ricotta is also a favorite. 
The rest is easy. Prepare the pasta al dente according to the package directions. Drain and set aside when cooked. While the pasta is cooking everyone can pick their pasta toppings.
As each person selects have them bring their ‘entree’ to the stove. I use a wok but a frying pan or saute pan will work just as well. Put a little olive oil in the pan add in the toppings. Stir until done. I season with sea salt, garlic, and fresh ground pepper. Add in the pasta and plate. Add the cheese of choice.
Quantities you ask? It depends on the size of your family. The great news about doing a pasta bar is you can save the leftovers in ziplock bags and get creative throughout the week.
 It’s a fun way to please everyone, get everyone interacting and it’s over and done in a matter of minutes.
I serve a crusty Italian peasant bread. No sides needed it’s an all in one dinner.
Great fun for kids and a nifty way to get them interested in veggies is this ‘interactive’ plate I  bought at z gallerie.
Looking for some more delicious and fast weeknight dinners? Check out these great #SundaySupper recipes:
- Greek Dogs by Supper For a Steal
- Pasta with Sausage and Broccoli by Bobbi’s Kozy Kitchen
- Grilled Chicken Caesar Salad by Magnolia Days
- Double Duty Fajita Chicken: Nachos Supreme and Enchiladas by Doggie at the Dinner Table
- Zucchini, Corn and Bacon Crepes by Vintage Kitchen
- Oregon Shrimp Quesadillas by Pescetarian Journal
- Korean omelet rice by Crispy Bits & Burnt Ends
- Lemon Dillled Salmon Croquette Burgers by Granny’s Down Home Southern Cooking
- Gluten Free Pepper Steak with Rice by No One Likes Crumbley Cookies
- Crispy Ravioli in Cherry Tomato Sauce by Shockingly Delicious
- BLT Soup by Meal Planning Magic
- Korean Pan-Fried Fish by Kimchi Mom
- Stove top mac ‘n cheese by Gotta Get Baked
- Deconstructed Enchiladas by In the Kitchen with KP
- Croque Monsieurs by Juanita’s Cocina
- Summer Squash and Mushroom Quesadillas by Chocolate Moosey
- Seared Lamb on a bed of Mashed potatoes with Artichoke Hearts by Cooking Underwriter
- Pasta with Creamy Kale Pesto by Webicurean
- Baked Spanish Tortilla by Happy Baking Days
- Grilled Chicken Caesar Pizza by In the Kitchen with Audrey
- Chicken Pasta with Spinach and Beans by The Lemon Bowl
- Tomato Pie by My Catholic Kitchen
- Shredded Chicken in Peanut Sauce Tacos w/ Corn & Zucchini Sauté by GirliChef
- Tomatillo Chicken Stew by Small Wallet, Big Appetite
- Pollo a la Crema by La Cocina de Leslie
- Baked Tilapia Fish Tacos by Home Cooking Memories
- Grilled Lemon Pepper Chicken with a Yogurt Dill sauce and a Greek Salad by Noshing with the Nolands
- Wagon Wheel Pasta with Pancetta & Peas by Chelsea’s Culinary Indulgence
- Lemon & Dill Shrimp Pasta w/ Oven Roast Corn by Mama, Mommy, Mom
- Ricotta – Tofu Tomato Toasts by Yummy Smells
- One Pot Spicy Asian Chicken and Rice by Hezzi D
- Turkey Italian Brown Rice Casserole by Momma’s Meals
- Flatbread Pizza with Cilantro Garlic Sauce by Mom’s Test Kitchen
- Kung Pao Shrimp by Mangoes and Chutney
- Cashew Chicken Stir-fry by Diabetic Foodie
- Chicken Bacon Avocado Quesadillas by Dinners, Dishes and Desserts
- Roasted Butternut Lo Mein by The Meltaways
- Potluck Casserole with Cornbread Stuffing by Cindy’s Recipes & Writings
- Jerk Chicken Chili by Mrs. Mama Hen
- Loaded Chicken and Steak Stuffed Potatoes by Big Bears Wife
- Steamed Tofu Serve with Fried Mix Vegetables by My Trials in the Kitchen
- Pasta with sausage and cherry tomatoes by Tora’s Real Food
- Chicken Ravioli with Peas and Bacon by Daddy Knows Less
- Chorizo Tomato Pasta with a Creamy Sauce by Avocado Pesto
- Quick N Easy Thai Coconut Shrimp Stir Fry by Sue’s Nutrition Buzz
- Whole Wheat Pizza with Hummus & Fresh Greens by Family Spice
- Speedy ‘n Spicy Shrimp Pasta. Will be dinner this Friday by The Weekend Gourmet
- End of Summer Grilled Peach and Chicken Salad by Sustainable Dad
- Teriyaki Tuna Bowl by Family Foodie
- Weeknight Stir Fry by From Fast Food to Fresh Food
- Baked Egg with Mushrooms and Bacon by Pippi’s in the Kitchen Again
- Taco Bake by Daily Dish Recipes
- Fried Rice and Black Beans by Mama’s Blissful Bites
- Chicken with Broccoli, Sun-dried Tomatoes and Bow Ties by That Skinny Chick Can Bake
- Pasta in Tomato sauce and turkey meatballs by Basic & Delicious
- Pasta Primavera by Midlife Road Trip
- Tots Your Tots Will Love by The Hand that Rocks the Ladle

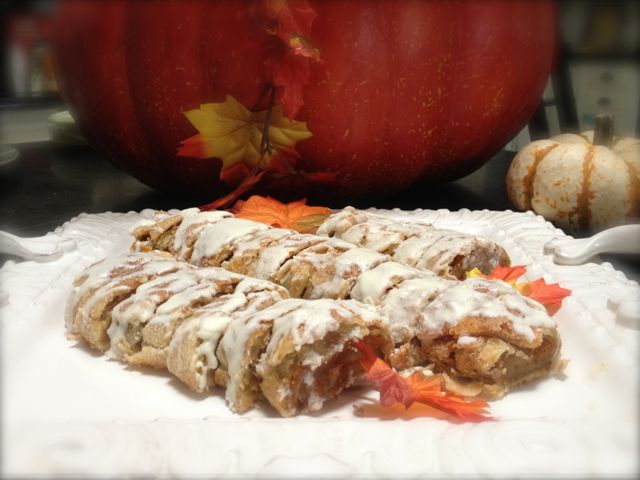
Trick or Treat: Pumpkin Pie Pinwheels Recipe
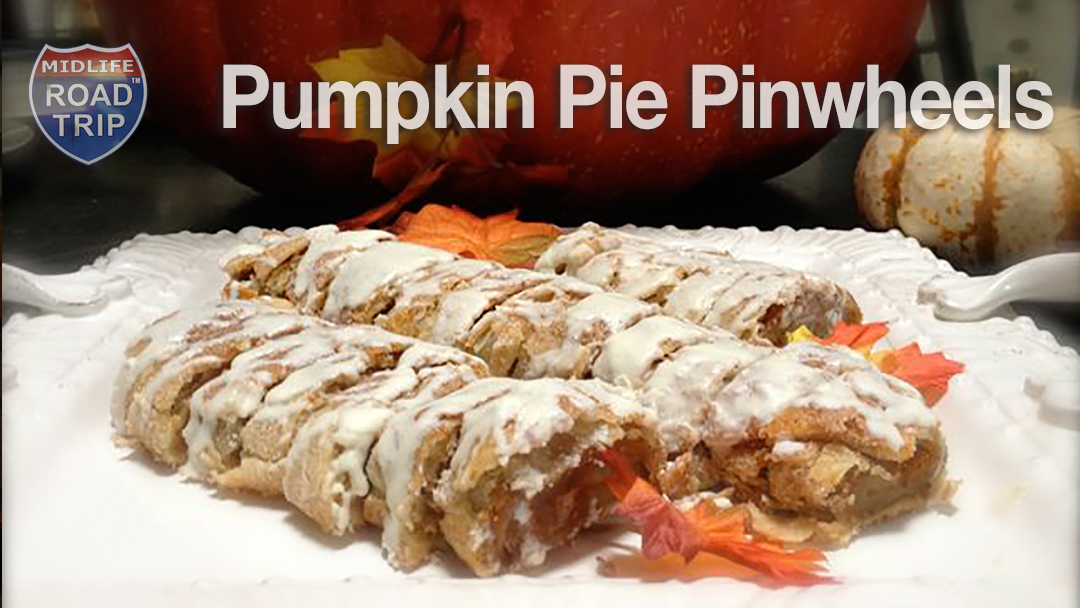
An Autumn treat: Pumpkin Pie Pinwheels
Now that fall has arrived, it’s time to whip up a few seasonal treats. Here’s a twist on the classic pumpkin pie. This Pumpkin Pie Pinwheel recipe is so simple it doesn’t require a fork. No Trick, all Treat!
Ingredients:
- 2 pie crusts, store-bought or a recipe of your choice
- 1 cup mashed pumpkin (remove moisture by setting on paper towels)
- 3 tablespoons whipped cream cheese
- 1/2 cup white sugar
- 3 tsp. ground cinnamon
- 1 tsp. ground nutmeg
- 1 egg white, beaten
- ¼ cup canned cream cheese frosting
Directions:
- Preheat oven to 425 degrees. Roll pie crusts onto a greased cookie sheet.
- In a small bowl, combine pumpkin, 3 tablespoons of whipped cream cheese, 1/4 cup white sugar, 2 tsp. cinnamon and 1 tsp. nutmeg. Spread pumpkin filling evenly on the two pie crusts.
- Roll up pie crusts. Brush each side with egg white.
- In a small bowl, stir together ¼ cup sugar and 1 tsp. cinnamon. Sprinkle evenly on top of rolls.
- Bake for 15-20 minutes, or until golden.
- Meanwhile, melt the frosting in microwave, and use to drizzle as desired over finished rolls.
- Once cooled, slice the rolls into ½ inch thick pinwheels.
- Makes about 20 pinwheels.
This mouth-watering seasonal favorite is adapted from an original recipe by one of our very talented MidLife Road Trip interns and budding baker, Jessica Kemper. Jessica is enrolled at USF St. Petersburg, majoring in Journalism and Mass Communications.
Check out these delicious Halloween inspired dishes from the #SundaySupper cooks and bakers!
- Bewitching Brews:
- Shrunken Heads in Cider – Girlichef
- Candy Corn Martini – The Messy Baker Blog
- Trick-or-Treat Wine Pairings for Halloween – ENOFYLZ
Ghoulish Gruel:
- Steak Bites with Bloody Mary Dipping Sauce – I Run for Wine
- Eggs in Purgatory – My Catholic Kitchen
- Mini Jack-o’-Lantern Sloppy Joe Pies – Small Wallet Big Appetite
- Baked Mummy Cheese Dogs – In the Kitchen with KP
- Meat Head – Ruffles & Truffles
- Goblin Eggs – Bobbi’s Kozy Kitchen
- Mummy Hot Dogs – Damn Delicious
- Spooky Kid Pizzas – Sustainable Dad
- Pumpkin Chili, Pumpkin Dip, & Wicken Witch’s Brew – Daddy Knows Less
- Monster Mash – Cindy’s Recipes & Writings
- Sloppy Worm Sandwiches – La Cocina de Leslie
Haunted Snacks:
- Gory Green Monster Eyeball Dip – Shockingly Delicious
- Marinated Mozzarella Eyeballs – Comfy Cuisine
- Eyeball Pinwheels – Home Cooking Memories
Spooky Sweets:
- Pumpkin Whoopie Pies with Biscoff Cream – The Girl in the Little Red Kitchen
- Spooky Ogre Eye Cookies – The Realistic Nutritionist
- Jack O’ Lantern Cookies – Magnolia Days
- Spooky Good Popcorn Snack Mix – The Weekend Gourment
- White Chocolate & Coconut Dipped Strawberry Ghosts – Sue’s Nutrition Buzz
- Monster Bites – Cravings of a Lunatic
- Vegan Halloween Sugar Cookies – Hezzi-D’s Books & Cooks
- Monster Cookies – Dinners, Dishes, and Desserts
- Tunnel of Doom Cake – That Skinny Chick Can Bake
- Candy-Stuffed Rice Crispy Treat Pumpkins – Chocolate Moosey
- Crispy Graham Bones – The Meltaways
- Dulce de Leche Bat Cookies – Crispy Bits & Burnt Ends
- Witch’s Fingers – Noshing with The Nolands
- Sweet Intestines with Broken Glass – The Little Ferraro Kitchen
- Graveyard Brownies – The Wimpy Vegetarian
- Boo Candy Corn & Chocolate Chip Cookies – Hip Foodie Mom
- Bleeding Devil Cakes – Momma’s Meals
- Pumpkin Halloween Munch – Big Bear’s Wife
- Halloween Peanut Butter Cookie Dough Cake Pops – Juanita’s Cocina
- Jack-O-Lantern Carrot Cake – Galactosemia in PDX
- Ghostly Chocolate Orange Tarts – Happy Baking Days
- Messy Monster Cookies – MarocMama
- Bewitchingly Delicious Butterscotch Broomstick Cake Pops – Mama.Mommy.Mom.
- Halloween Popcorn Cake – Pippis in the Kitchen Again
- Witches Morning Gruel – In the Kitchen with Audrey
- White Chocolate & Dulce de Leche Ghosts – Vintage Kitchen Notes
- Peanut Butter Candy Bar Cookies – The Cookie A Day Challenge
- Monster Cookie Revel Bars – Baker Street
- Halloween Cereal Bars – Basic N Delicious
- Ossi di Morti (Bones of the Dead Cookies) – Webicurean
- Pumpkin Pie Pinwheels – Midlife Road Trip

Blueberry Compote with Lemon Ricotta Pancakes
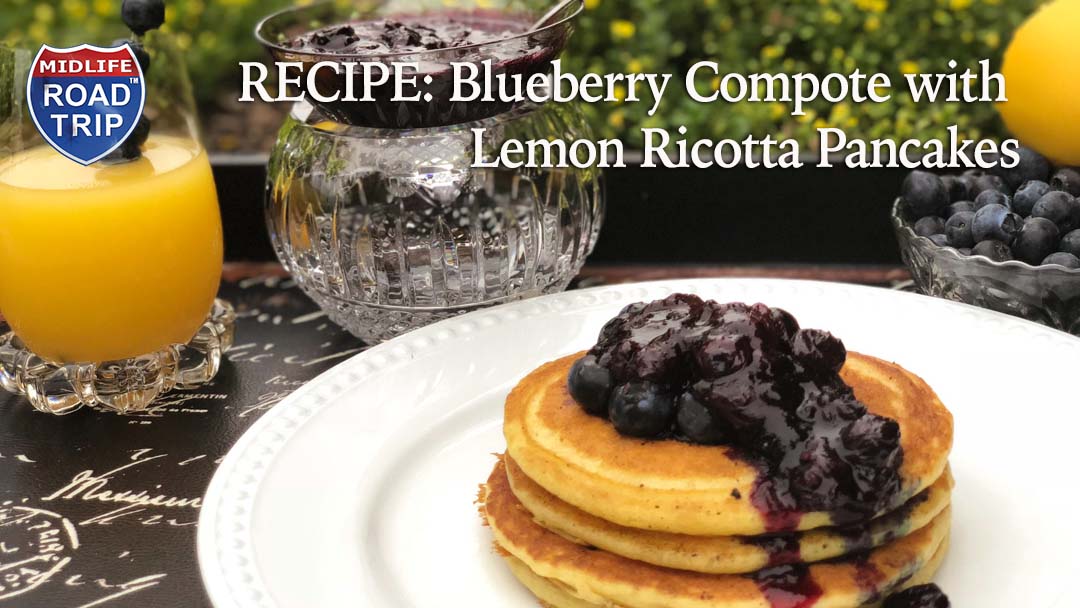
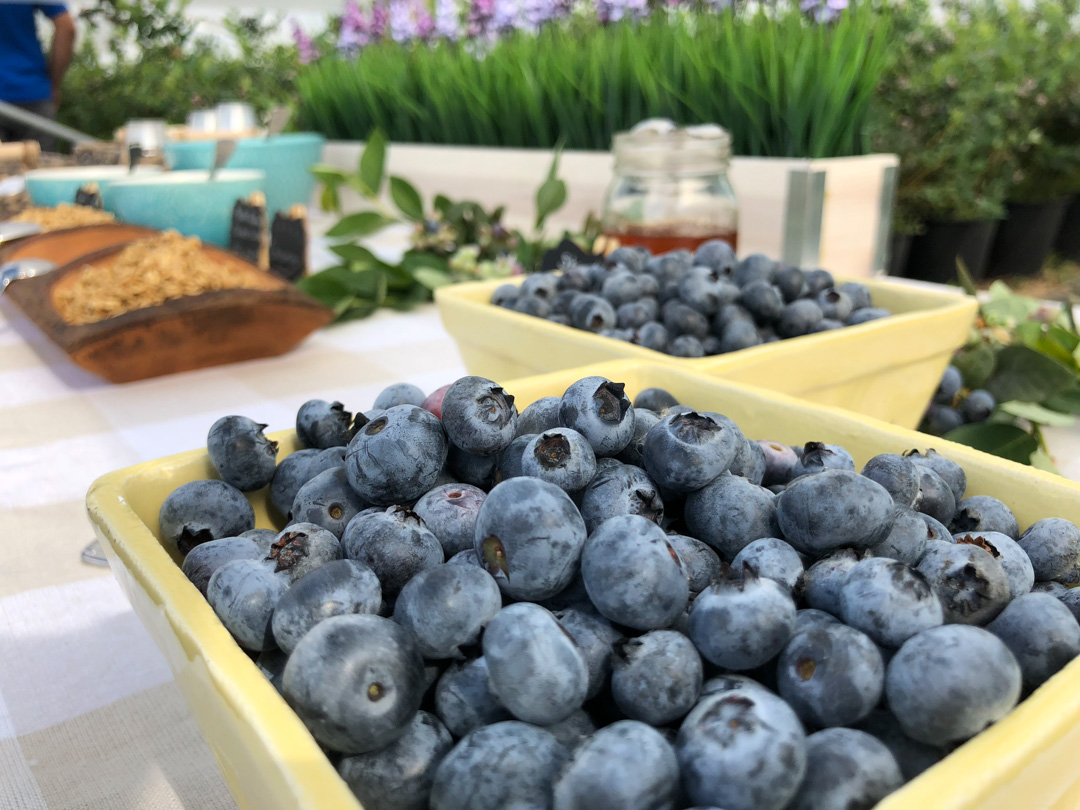
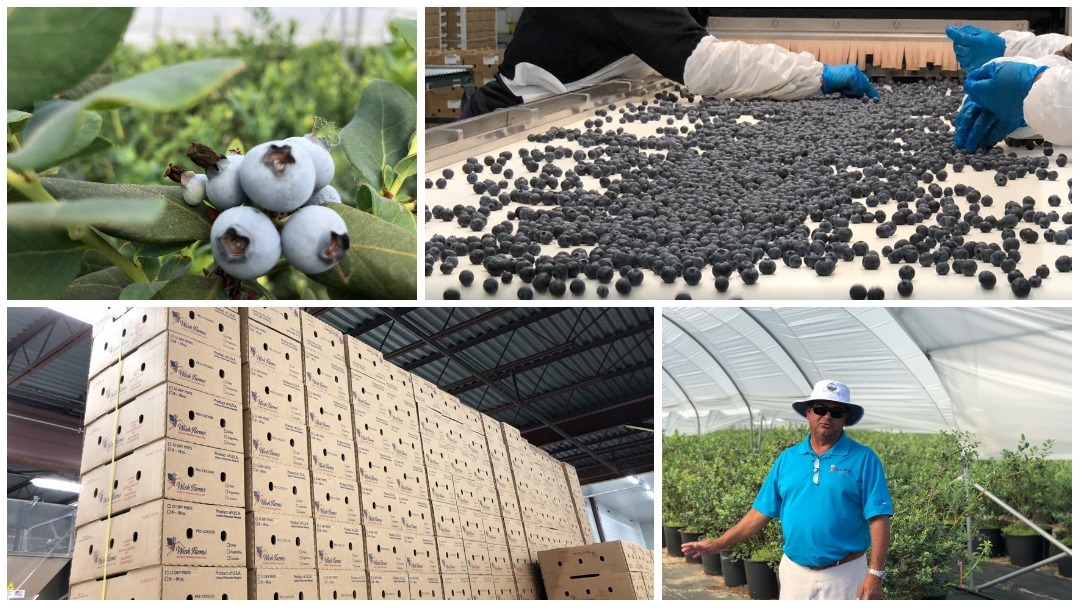
From the minute I stepped on to Wish Farms’ Misty Organics Blueberry Farm I envisioned making a blueberry compote and lemon ricotta pancakes. The blueberries, plump and juicy were perfect. As we strolled throughout the twenty-acre farm we learned about and tasted the 7 organic blueberry varieties that they grow. They were as delicious as they were pretty. We also toured the Wish Farms packing facility and watched the entire process from the berries arrival from the farm to sorting, packaging, and shipping. It was seamless.
The older I get the more important it is to me to learn about where my food comes from. Good food is the best medicine. Did you know that blueberries are powerful antioxidants, they boost immunity, reduce inflammation, support brain health, protect against heart disease and cancer, help regulate blood sugar and they even fight off UTIs. Why pop a pill when you can enjoy a bowl of blueberries?
And, you can enjoy them year-round. While Wish Farms southeast (FL, GA, and NC) are in season now, did you know that you can freeze fresh blueberries for up to a year? Wish Farms says:
- Gently rinse blueberries with cool water
- Pat lightly with a towel to soak up water.
- Allow time for the berries to thoroughly dry.
- Evenly lay berries on a cookie sheet
- Place cookie sheet into the freezer for approximately 2 hours; or until berries are completely frozen
- Pour frozen berries into a large plastic zipper bag and seal tightly
- Write the date on the plastic bag and store in the freezer.
I decided to make my compote with frozen blueberries, so no matter what season it is we can enjoy that fresh, farm to table flavor. Bon appetit!
Blueberry Compote
Ingredients
1 1/2 Pints of Frozen Blueberries
4 tablespoons of granulated sugar
1 teaspoon of lemon zest
1/4 teaspoon of lemon juice
1/4 teaspoon of finely chopped fresh lavender
Yields approximately 2 cups.
Directions
- Place half of the frozen blueberries in a saucepan over low heat, stirring gently.
- Slowly add the sugar, lavender and lemon zest.
- Turn heat up to medium to medium-high and bring to a boil.
- Add the remaining blueberries, reducing the heat to low. Stir occasionally for 6-7 minutes.
- As the berries open, the juice will become thicker.
- Once the berries juice has been reduced, remove from the heat and incorporate lemon juice, cooling mixture to room temperature.
Lemon Ricotta Pancakes
Ingredients
1 1/2 cups all-purpose flour
2 tablespoons sugar
1 teaspoon baking soda
pinch of salt
1 1/2 cups buttermilk
2 large eggs
2 1/2 tablespoons grated lemon peel
1/3 cup ricotta cheese
Coconut oil
Directions
- Mix dry ingredients (flour, sugar, salt and baking soda) in a large bowl.
- Mix eggs, buttermilk, and lemon zest together.
- Whisk the ricotta cheese into the eggs, buttermilk and lemon zest.
- Add wet ingredients to the dry ingredients.
- Grease your griddle with coconut oil and turn to medium heat.
- Once the two are fully incorporated, use a ladle to pour batter on to the griddle.
- Flip pancakes when the batter bubbles and ends brown.
Yields 10-12 medium size pancakes
What’s your favorite way to use blueberries?
This post is sponsored by Wish Farms in conjunction with a social media campaign through Sunday Supper LLC. All opinions are my own.
![]()
You can find learn more about Wish Farms here:
Facebook Instagram Pinterest Twitter YouTube
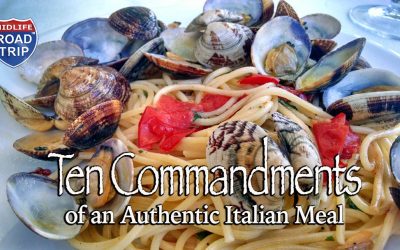
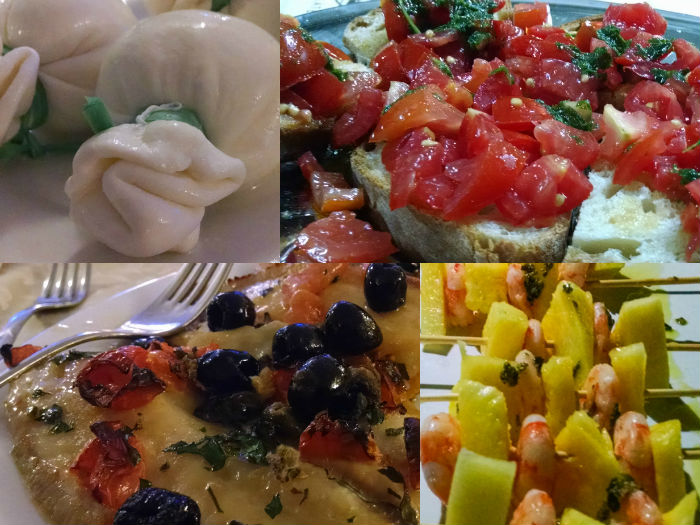
Ten Commandments of an Authentic Italian Meal
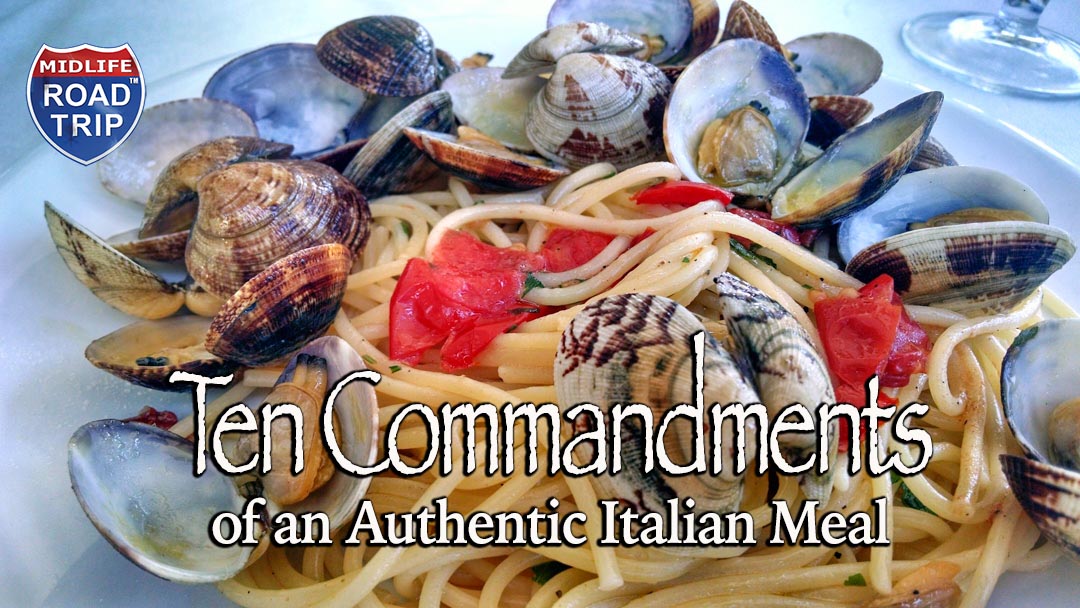
Anybody who follows our adventures knows that we love to eat. We believe the best way to appreciate and embrace a culture is through its cuisine. I was recently hosted on a trip to Gargano, Italy by a local tourism group called Gargano OK. Gargano is the “spur of the boot” jutting out into the Adriatic Sea. It is a popular destination among Italians but it is not nearly as touristy as many of the other regions in Italy. Therein lies her charm. Less touristy equals more authenticity. It was here that I enjoyed the most authentic culinary experience of my life and surmised what I consider to be the ten commandments of an authentic Italian meal.
In the United States, it takes me less than 15 minutes to consume most meals. Heck, I’ve consumed many meals in my car between traffic lights. What I love about Italy is that meals are not just about taste and sustenance. Italian meals are about the experience. They are an event – consisting of several courses, often lasting two to three hours.
I was blessed to experience many fantastic meals during my time in Gargano. Though there are some variations to these meals, adherence to these ten commandments make for the ultimate authentic experience.
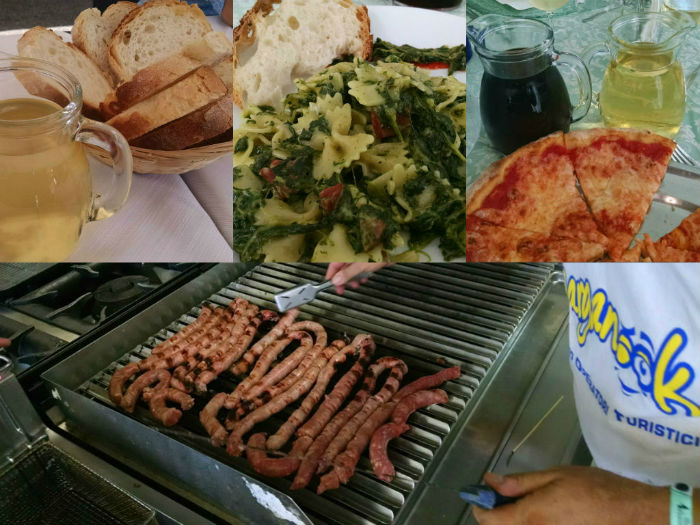
1. Thou shalt eat bread
Without exception, whenever we sat down, we were greeted fresh warm bread.

2. Thou shalt enjoy the fruit of the vine
Shortly after being seated, vino rosa (red wine) and vino bianco (white wine) are brought to the table, often in pictures. I could get used to this tradition in a hurry!
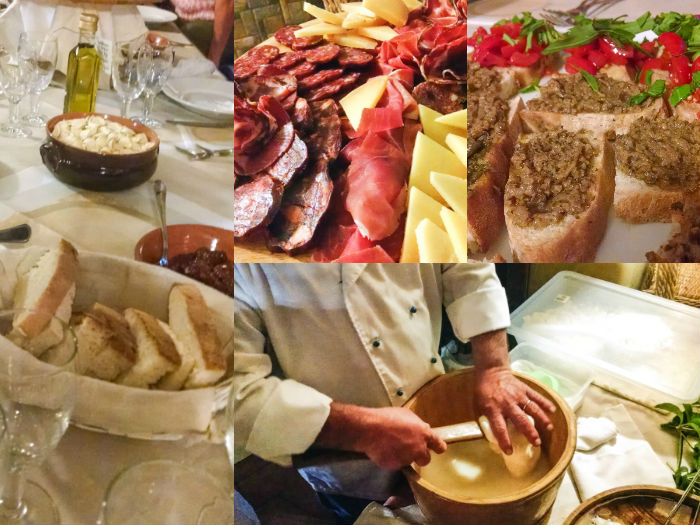
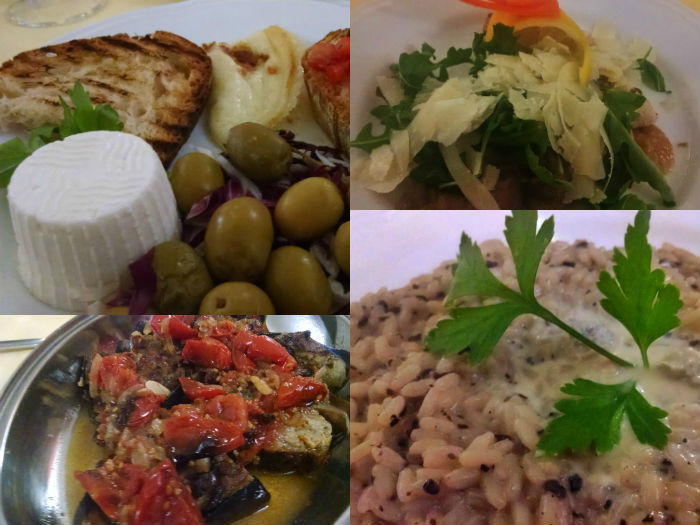
3. Thou shalt eat appetizers
Appetizers usually consisting of prosciutto, cheese, and bruschetta are served. There’s nothing better than fresh, warm mozzarella!

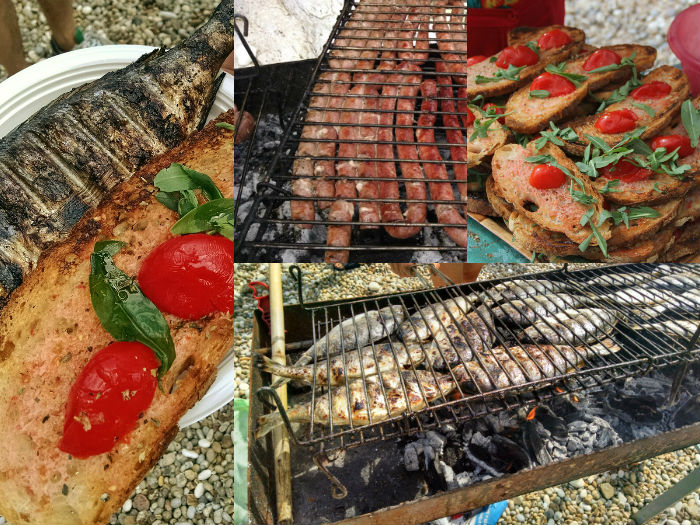
4. Thou shalt savor seafood
With over 100 miles of coast on the Adriatic Sea, it’s no wonder that seafood is prominent with every meal. The seafood course would usually consist of a combination of fish, muscles, shrimp, prawns or squid.
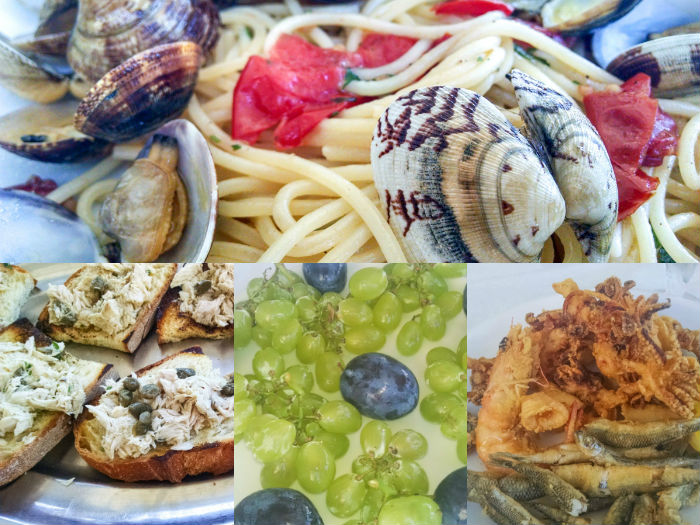
5. Thou shalt partake of pasta
In the states, I would consider the pasta course a meal in itself. There are endless combinations of pasta noodles and sauces.
6. Thou shalt eat meat
The meat course would usually consist of a meat (chicken, beef, lamb or fish) served with vegetables.
7. Thou shalt feast on fruits
Fresh fruit is always present in an Italian meal.
8. Thou shalt devour dessert
You can’t really call it a meal without dessert. Just when you feel like you can’t eat another bite, they bring irresistible gelato, cookies, cake, and tiramisu!
9. Thou shalt conclude with coffee & limoncello
Most meal events concluded with a caffeine concoction to counter the inevitable sugar crash from the dessert course. Whether you choose coffee, expresso, or cappuccino, you can’t go wrong. It’s Italian and it’s awesome! And just when you think it’s all over, you are presented with a shot of limoncello – a sweet, syrupy liqueur made from the zest of lemons.
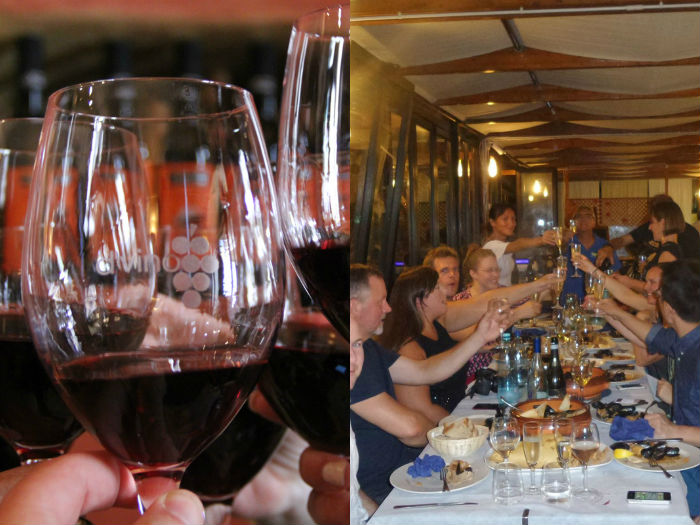
10. Thou shalt enjoy thy dining companions
There’s no hurry as meals are meant to be savored along with the companionship of your fellow diners. Sharing laughs while consuming incredible food creates a unique bond among those at the table – a bond that transcends cultures.
What’s your favorite authentic dining experience?
Special thanks also to Hotel Pellegrino Palace for our wonderful meal and accommodations on our last evening on Gargano and thanks to Zangardi Tours for their contributions in putting our amazing trip together. Gargano will forever be in my heart and on my mid-section.
Fresh Herb Crusted Beef Tenderloin with Horseradish Cream #Recipe

There is nothing more satisfying than preparing a special occasion meal for your family and friends. This roasted Certified Angus Beef® brand tenderloin with fresh herb crust and horseradish cream recipe is simple, flavorful and makes for a beautiful presentation. It’s perfect for a special occasion meal and is easy enough to prepare so you get to spend more time entertaining than slaving away in a hot kitchen.
I’m a modern, tech-savvy mom who has a penchant for apps and my smartphone is always within arms length. So when Certified Angus Beef® brand created an app with recipes, suggestions on cut and size, and it even calculates exact cooking times, I downloaded it faster than you could say medium-rare. Always unsure if I am going to over cook my roasts, the app gave me a new found confidence and a perfectly roasted beef tenderloin. Did you know that Certified Angus Beef® brand is the highest quality of beef on the market?
My family loves this recipe and they request it again and again.
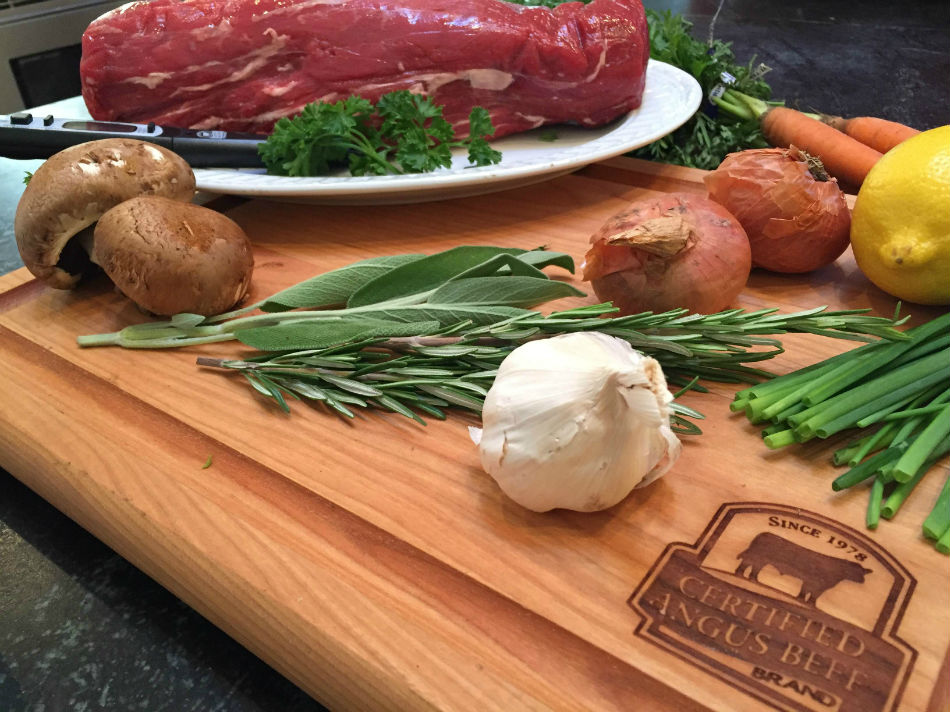
Ingredients
 For the tenderloin:
- 2.5 to 3-pound piece of Certified Angus Beef® brand tenderloin (cut from the center of the tenderloin)
- 1 teaspoon Himalayan sea salt
- 1 teaspoon coarse black pepper
- 2 Tbsp Olive Oil
- 4 Tbsp minced shallots
- 3 Tbsp minced garlic
- 4 Tbsp finely chopped fresh rosemary
- 4 Tbsp finely chopped thyme
- 3 Tbsp fresh sage
- 1 cup of beef stock
For the red wine reduction:
- 1 thinly sliced shallot
- 2 Tbsp minced garlic
- 1 cup of red wine ( always use a nice wine I will serve with dinner)
- 1 stick of unsalted butter
For the horseradish cream:
- 1 1/2 cups of sour cream
- 1/2 cup of white horseradish
- 3 Tbsp fresh squeezed lemon juice
- 3 Tbsp chopped chives
Directions:
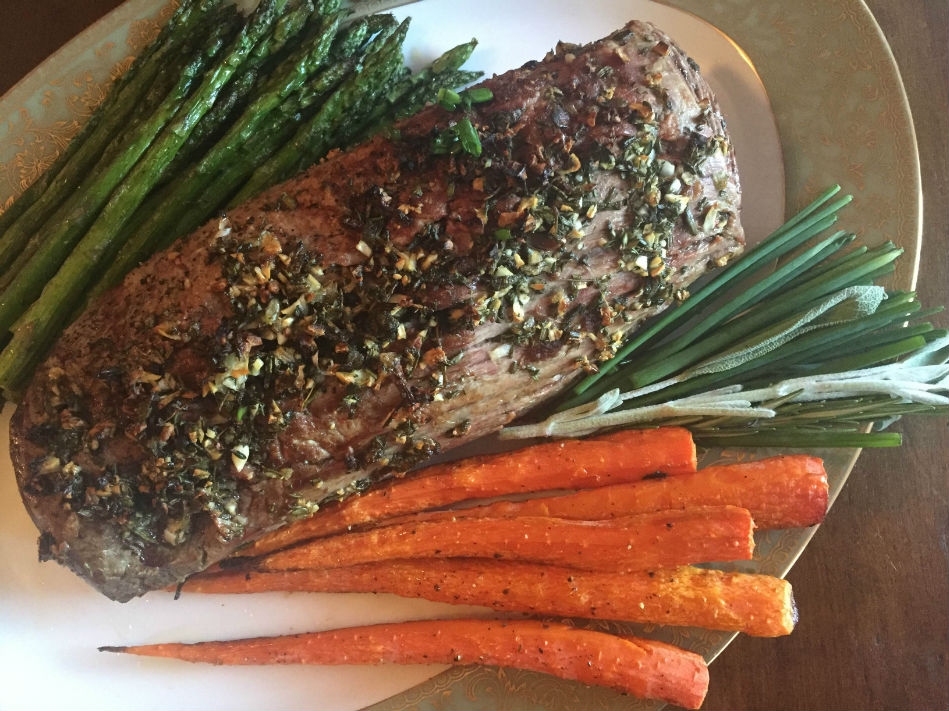
Preheat the oven to 400°F. Sprinkle some olive oil in a large skillet and brown Certified Angus Beef® brand Tenderloin on all sides. Transfer to a rack on a roasting pan, with 1 cup of beef stock. Save the skillet to the side.
Combine rosemary, thyme, sage, garlic, shallots, salt, pepper and olive oil in a small bowl and mix well. Rub mixture all over the tenderloin. Place in oven until your internal thermometer reaches a temperature of 125 to 130 degrees F (about 30-35 minutes) for a perfectly roasted tenderloin. Remove from roasting pan and let rest for about 15 minutes.
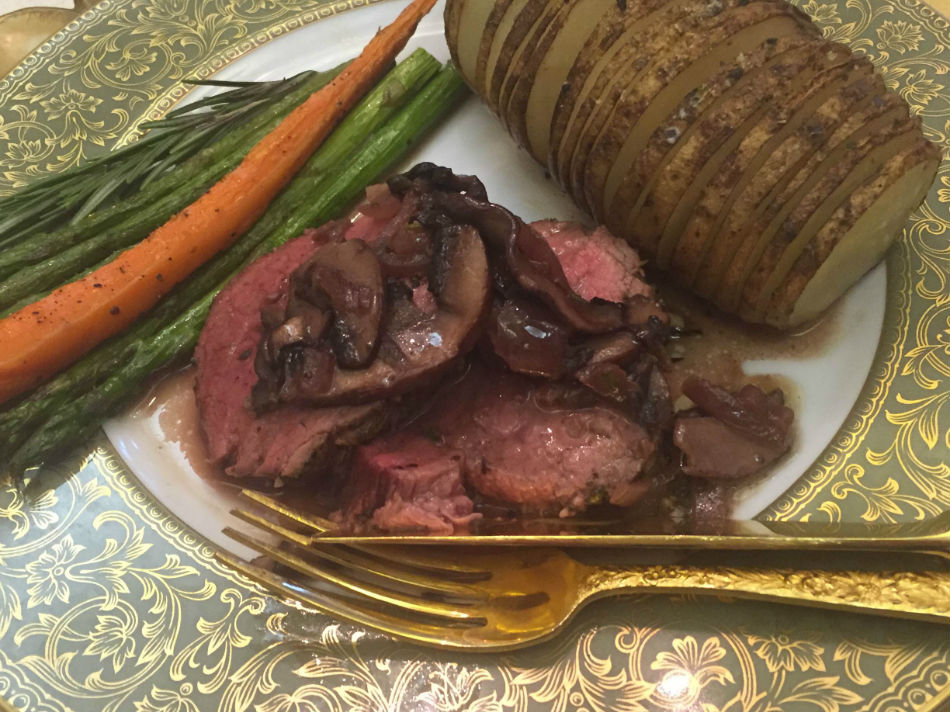
Place 1 thinly sliced shallot, 2 Tbsp minced garlic and 1 stick of unsalted butter into the skillet where you browned the tenderloin and sauté until the shallots are tender. Add 1 cup of red wine and heat until it is reduced. Slowly add in beef stock from the roasting pan and continue to simmer until sauce reduces further.
In a small chilled bowl combine 1 1/2 cups of sour cream, 1/2 cup of white horseradish, 3 Tbsp fresh squeezed lemon juice, and 3 Tbsp chopped chives. Blend well and serve on the side.
Dr. Terry Simpson says: “Eat your steak with your veggies, and consider a good rub on it.” For more on a healthy diet, including beef, read more from Dr. Simpson on YourDoctorsOrders.com
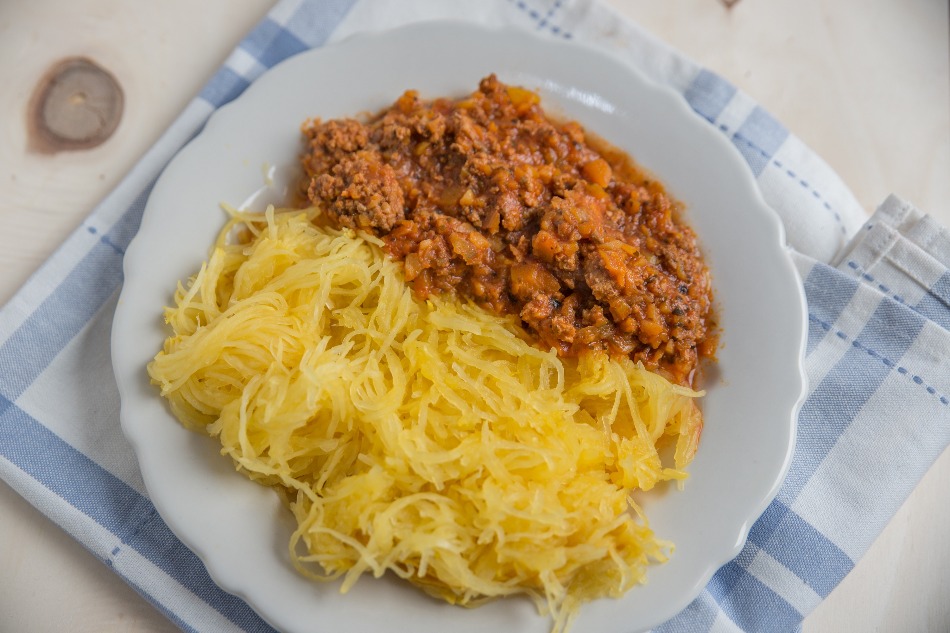
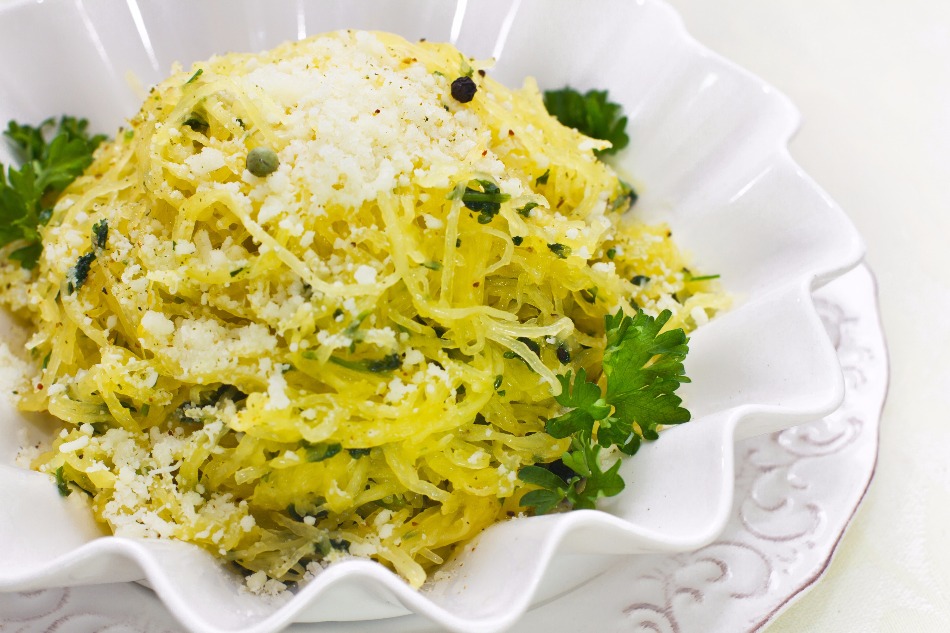
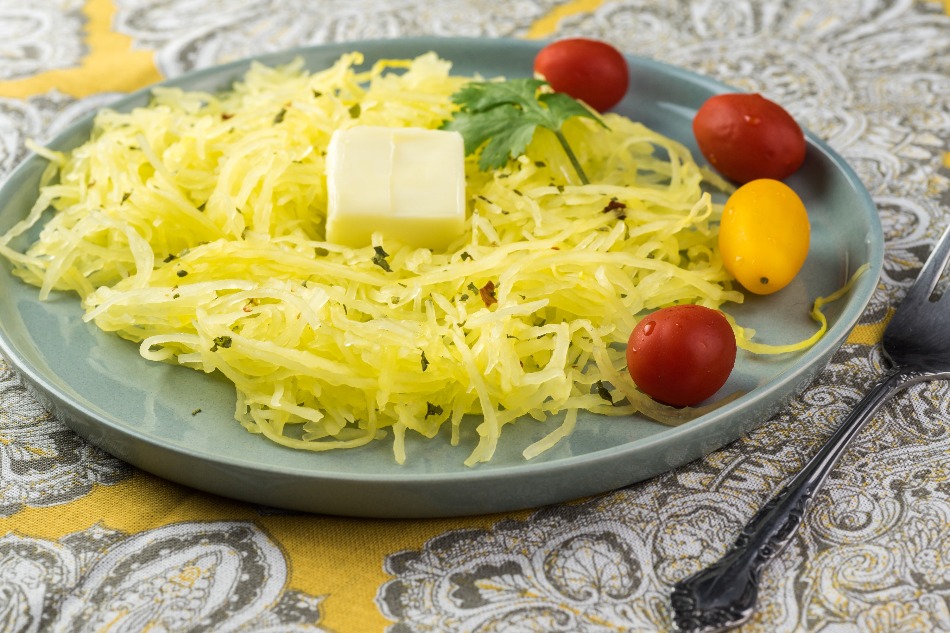
20 Spaghetti Squash Recipes – Stay Healthy, Live Fit
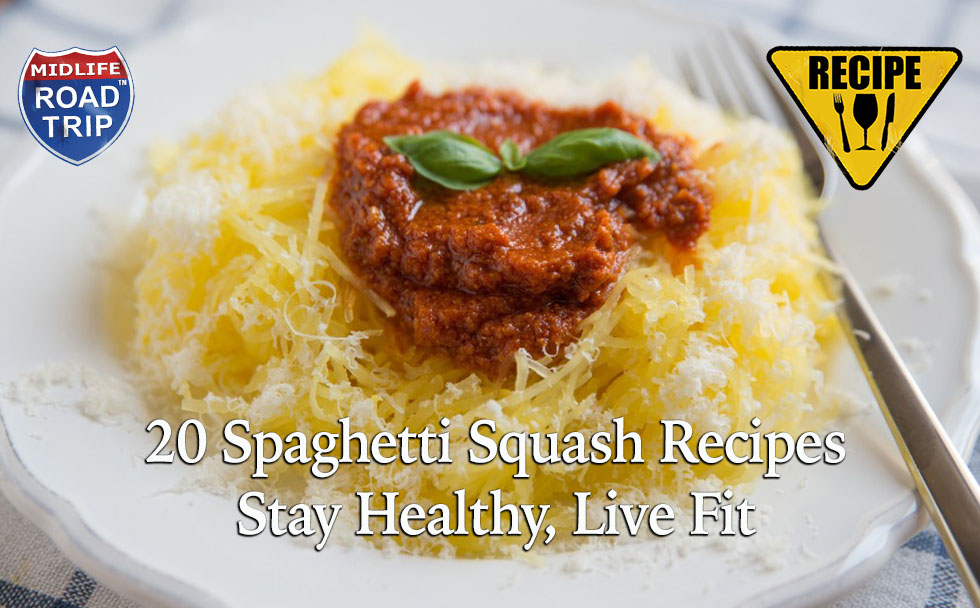
Spaghetti squash can be a healthy alternative to pasta. It helps our optimal cellular function and in the development of new cells.
Spaghetti Squash is a pale yellow or orange-yellow gourd, while the intestine is usually filled with pumpkin, while boiling the flesh itself leaves the fiber, which can be used as spaghetti noodles. You can replace this pumpkin with ordinary pumpkin in soup recipes, grilling or accompanying dishes.
Spaghetti maintains muscles and is helpful for people with high blood pressure problems. It prevents inflammation and helps the brain to function well.
The minerals in spaghetti give a glow to the skin and maintain your body fat. In this article I will share with you delicious and nutritious recipes, good for health, especially the girls want to lose weight, Let’s see how to make spaghetti squash.
How to bake a Squash
- · Preheat oven to 375 degrees.
- · Cut the squashes in half and apply a little oil on each side
- · place on the baking sheet with flesh side down.
- · Bake squash for 40-45 min from both sides.
- · Preheat oven to 375 degrees. Cut squash in half lengthwise, remove all seeds and place on the baking sheet face down. Bake for 40 minutes or until tender.
- · Once squash is cooked and cooled, use a fork to shred flesh into large bowl. At this point, increase oven temperature to 400 degrees.
1 Lasagna Stuffed Spaghetti Squash Method
- · Cut the spaghetti squash in half using a large knife. Scrape out seed using a spoon and through the seed away.
- · Place squash halves on a parchment paper in the microwave and cook for 10-11 min. on High power
- · Now take a bowl, fold cottage cheese, Romano and 1 tsp. Pepper in the broccoli. Add 1tsp. Salt and pepper to the squash halves. Fill the two squashes with an equal quantity of cheese mixture and top with sauce. Now add mozzarella and Broil until the filling is heated and seems brownish golden in color.
- · Serve with green salad.
2. Spaghetti Squash, Quinoa, and Parmesan Fritters-Method
- · Take two 2 cups of cooked spaghetti squash
- · Make it moisture by keeping in a paper towel and squeezing.
- · Beat 2 eggs in a large bowl for 1-2 min. Add a little flour combine them by beating more 1 min. Add spaghetti squash, Parmesan cheese, tsp salt, chopped spinach, and quinoa.Add seasoning according to taste if needed.
- · Heat skillet and make it hot. Add olive oil and drop spoonful batter on the skillet. Make the fritter flatter and round in shape using a spatula.
- · Cook till the bottom of each fritter is golden brown. Flip fritters to opposite and cook for more 2 min.Turn off the heat and let fitters stay in skillet for more 3 min.
- · Serve it with green onions and greek yogurt.
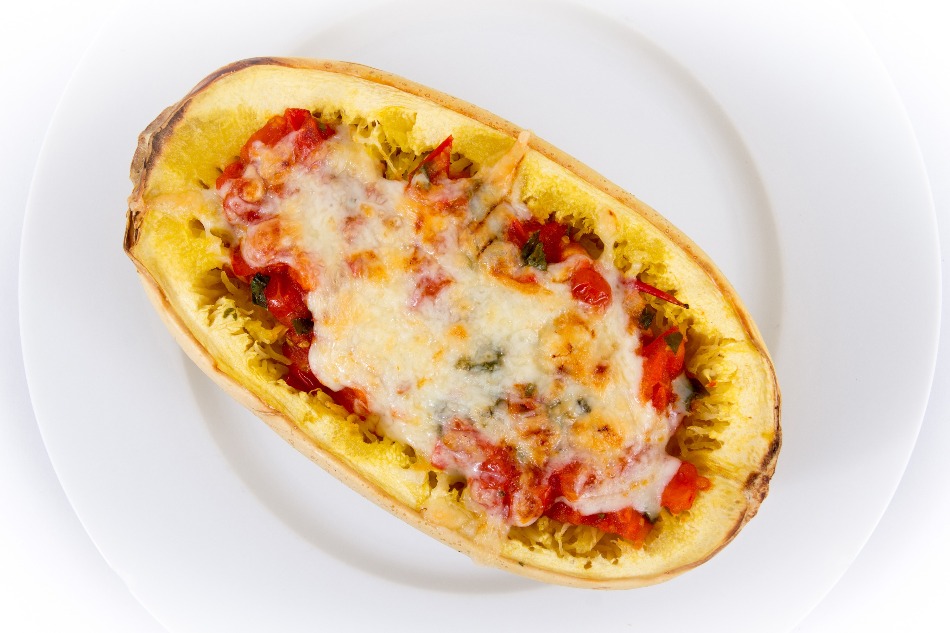
3. Spaghetti Squash Pizza Boats
- · Take a baked, cleaned(seed discarded) Spaghetti squash.
- · Add cup pizza sauce and shredded cheese to each squash up to ¼ cup.
- · Sprinkle a pizza toppings on the sauce on each half of squash and add ¼ cup mozzarella cheese. Place the squash in the oven and broil for 6 min.( have an eye on toppings and don’t let it burn)
- · Now remove from oven and serve.
4. Cheesy Buffalo Chicken Spaghetti Squash Bowls
- · Take a baked squash. Add cooked chicken to it and you can cook chicken according to your choice.
- · Mix the chicken, cheese hot sauce, melted butter, Greek yogurt, onion, salt, jalapeno, and pepper.
- · Scrape the spaghetti squash bowls with the fork and mix the chicken mixture in the squash.
- · Add little extra cheese and cover the baking dish with foil leave at room temp.
- · Bakr for 20 min. At 350 degree And then remove the foil and broil for 3 min.
- · Garnish and Serve with green onion, hot sauce.
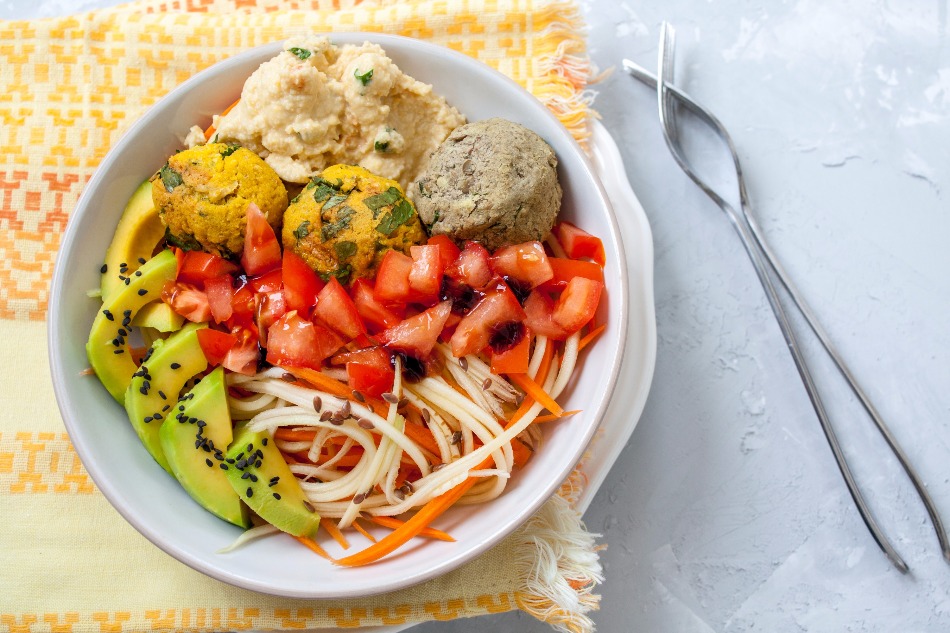
5. Spaghetti Squash Burrito Bowl
- · Take a baked squash
- · In a bowl of medium size add chili powder, salt, black beans, corn and pepper
- · Stir well the above mixture.(But bake this mixture few min. In microwave to make it warm before serving)
- · Take a skillet and warm 1tsp olive oil. Add sliced peppers and salt
- · .Saute until the pepper tends to be slight brown( about 7 min.)
- · Stuff squash with romaine, black bean mix, peppers and top with desired toppings and serve.
6. One-Pan Spaghetti Squash Chow Mein
- · Take a skillet, heat the sesame oil and coconut oil over low heat. Add onions to the oil and cook until they seem to be transparent and soft.Add garlic and cook for 30 sec. Then add shredded carrots and sliced cabbage and cook about 10 min.
- · Microwave picked spaghetti squash for 6 min. At high temp. turn the squash and cook additional 6 min.After that leave it to cool.
- · Mix honey, fish sauce, grated ginger, coconut amino, chili flakes, salt, and pepper.
- · Remove the seeds and scrape the squash.
- · Add sauce, shrimp and cooked chicken to the squash.
- · Heat until shrimp are pink
- · Taste the seasoning and add any if needed.
- · Serve to warm with a topping of green onion, spring onion.
7. Broccoli Cheese Stuffed Spaghetti Squash
- · Take a dish and add squash halves in it, Add ¼ cup of water to the bottom of the dish. Microwave it for 10-11 min i=until squash is tender. And then place it to cool at room temp.
- · Add red pepper flakes in a non-stick skillet and cook for 30 sec. Add garlic, Broccoli and stir the mixture well.
- · Add 2tsp water and heat up the skillet. Saute about 5 min.
- · Discard the left water and add the mixture in the bowl.
- · Scrape the squash and add the bowl mixture with broccoli mixture in it.
- · Add salt, pepper, cheese and stir well
- · Distribute the mixture equally in squash and boil then sprinkle ¼ cup of mozzarella on top of squashes. Place the squash in oven safe pan.
- · Broil until cheese is browned.
- · Serve hot.
8. Chicken Piccata Spaghetti Squash Boats
- · Take a baked spaghetti squash.
- · Place a nonstick pan over high heat and add cubed chicken( chicken mixed with flour, salt, and pepper) then add 2tps of olive oil.
- · Cook and stir well the chicken about 4-7 min., remove the pieces to plate when done.
- · Put skillet on the stove and set medium heat. Melt butter (about 1tsp) and add the shallot and saute until color changes to light golden then add garlic, salt, and pepper and stir about 30 sec.
- · Add lemon juice and chicken stock to skillet and heat 3-4 min. Turn the heat off and whisk in 3tps of butter, parsley, and capers. Apply sauce and taste the season.
- · Toss cooked chicken by adding to skillet.
- · Divide the chicken and serve with spaghetti squash
9. Sausage and Peppers Stuffed Spaghetti Squash
- · Take a baked spaghetti squash
- · Set skillet over medium-high heat, add sausage stir well. Add pepper, onions and cook till sausage is browned in color. Add spices and garlic and cook 30 sec. More.
- · Pour tomato sauce in the skillet and cook a little. Now press squash a little and add sausage mix in it and top with cheese. Broil for 15 min. And serve hot.
10. Spaghetti Squash Hash Browns
- · Remove the skin of the squash and Squeeze the squash, to remove moisture.
- · Add chives, salt, garlic powder, pepper, and egg. Stir well.
- · Cook squash mixture in skillet about 10 min.
- · And serve hot.
11. Spaghetti Squash Alfredo
- · Take a spaghetti squash and discard seeds. Microwave squash by applying ¼ tsp salt and pepper for 10 min.
- · Heat a saucepan and butter to simmering on low, simmer 5 times.
- · With the folk scrape the flesh of the squash and divide the sauce into the two halves.
- · Top with mozzarella and broil for 2 min. And serve hot.
12. Spaghetti Squash Recipe With Mushrooms And Parmesan
- · Take a baked spaghetti squash
- · Add olive oil in a skillet with some garlic and thyme, cook for 2 min. Over high heat.
- · Add mushroom in skillet and cook for 8 min. And turn off heat after cooking
- · Scrap the squash into strings and add to skillet.
- · Sprinkel parmesan and top with parsley, salt, and pepper. Serve hot
13. Spinach and Spaghetti Squash Dip
- · Take a baked spaghetti squash ( moisturized).
- · Cooking of spaghetti squash can be done in advance.
- · Take cream cheese, greek yogurt, parmesan and mozzarella cheese in pan and stir over medium heat.
- · Add spinach and squashed spaghetti squash and cook for 2 min. Over medium heat in the pan.
- · Add garlic and season with cayenne pepper and salt. Serve hot and enjoy
14. Spaghetti Squash Casserole With Spinach
- · Take a well-cooked spaghetti squash shredded
- · Heat onion, butter, bell pepper and minced garlic in skillet, sauté for 5 min.
- · Add chopped spinach and heat more 1-2 min.
- · Add greek yogurt, egg, chili flakes and bread crumbs with some Parmesan cheese.Season with pepper, salt and stir well.
- · Pour 1 cup spaghetti sauce into a baking dish of 2 quarts. Spread the sauce and add veggies. Stir slightly to mix squash and add more spaghetti sauce with little breadcrumbs, parmesan, and the cup of mozzarella cheese.
- · Bake the dish at 400 degrees for about 20 min.
- · Serve by adding toppings of red pepper flakes and Parmesan cheese.
15. Garlic Shrimp Spaghetti Squash
- · Take a baked and cooled spaghetti squash
- · Take a medium sized pot and spray with cooking spray.
- · Saute garlic on medium heat and add almond milk, greek yogurt to the pot and whisk gently.
- · Add parmesan cheese when sauce tends to boil and mix till cheese melts.
- · Add shrimp to a cooking pan and spray with cooking spray.
- · Season sea salt, lemon juice, garlic powder and cook for 5 min.
- · Add greek yogurt, Alfredo and spaghetti squash to pan
- · Serve hot and enjoy.

16. Spaghetti Squash Carbonara
- · Take a cooked, stringed spaghetti squash.
- · Cut bacon into pieces and cook in a skillet.
- · Mix eggs, pepper, and cheese in a small different bowl
- · Add garlic to a pan and cook for 1min. And add bacon, spaghetti squash, and heat.
- · Garnish with cheese and Parsley and serve.
17. Spaghetti Squash Lasagna Boats
- · Roast spaghetti squash and remove seeds out.
- · Add 1 tsp olive oil in a skillet and squeeze the sausage meat into the pan. Cook for 5 min and then add onion, grated garlic and cook for 1 min.Turn the heat low by adding marinara sauce.
- · Make spinach ricotta mixture in a bowl and season with a pinch of pepper and salt.
- · Scrape the spaghetti in threats. And to the oven at 450 degrees.
- · Bake marina sauce, ¼ spaghetti squash, ricotta and mozzarella cheese, ¼ of spaghetti noodles for 15 min. Serve after 5 min.
18. Lemon and Herb Spaghetti Squash with Roasted Shrimp
- · Take baked spaghetti squash.
- · Add oil and butter in skillet, add shrimp and season with salt pepper
- · Add garlic and heat
- · Add lemon zest, white wine, lemon juice, Dijon mustard heat.
- · Scrape the spaghetti squash.
- · Serve with yogurt and cream
19. Southwestern Stuffed Spaghetti Squash
- · Take baked spaghetti squash
- · Stir corn and beans in a bowl by adding enchilada sauce
- · Pour mixture in each half of squash and baked for few min. Serve hot
20. Spaghetti Squash Pie
- · Take a pie plate and add oil, butter. Cut squash crosswise into four equally thick and lay them on a baking sheet and sprinkle salt and bake for an hour.
- · Add oil to skillet and heat.
- · Add zucchini and fry for 5 min.
- · Apply tomato sauce in a fine mesh strainer and drain excess water.
- · Add onion and cook for 10 min in skillet, add 1 tsp salt, pepper, egg, and ricotta, stir well
- · Shred squash and moisturized it. And spread in a plate.
- · Spread zucchini sauce and top with desired toppings and serve the dish.
Conclusion
I have shared some great recipes on spaghetti squash that will help you have better meals and save you time and money. With love cooking and constantly looking for new recipes, cheap and quality, delicious and nutritious. I’ve been collecting and writing delicious recipes with spaghetti squash. Hopefully with a little knowledge and my cooking experience will help you have good meals, nutritious with family and friends.
 About the Author Lita Watson:
Hi there! I’m Lita, voice of Quick Easy Cook and I’m absolutely in love with cooking blogs. I’m a beginner in cooking and i try my best to make it quick and easy. Even though, it’s not always quick and easy to keep up with fancy dinners… so i keep learning and blogging about quick and easy ways to create delicious and yummy foods for my two kids and a wonderful husband.

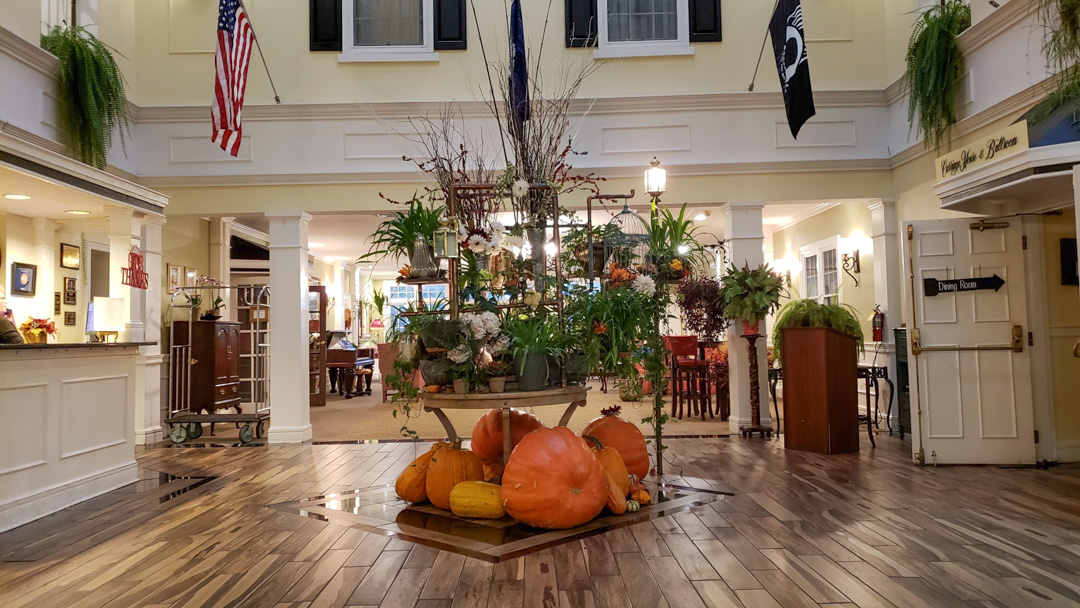
14 Experiences that make South Carolina’s Old 96 District Worth the Detour

Most of my previous visits to the great state of South Carolina have been to the coastal areas. I’ve visited Charleston and Myrtle Beach on multiple occasions and have never really given much thought to the rest of the state. However, a press trip exploring the state’s Old 96 District rekindled my love for going off the beaten path and exploring lesser-known destinations. The Old 96 District is known as the state’s Freshwater Coast and is located in the northwestern part of the state. It is the epitome of old southern charm. Over the course of a
Greenwood County
Located in a strip shopping center, Fat Daddy’s BBQ seems to be the go-to BBQ place for locals and has some of the best “Pig Art” I’ve ever encountered.

2. Main Street
The Greenwood Museum, Community Theatre, and Arts Center are adjacent to each other on Main Street. The museum features a 1900’s Main Street exhibit. The theatre has live performances throughout the year. And the art’s center features a really cool display of Instagram photos from the community.
3. Horticultural Workshop
Each summer Greenwood puts on a month-long Festival of Flowers that has been named one of Southeast Tourism Society’s Top 20 Events in June. While I wasn’t there for the festival, I did visit the Horticultural Workshop on Phoenix Street where some impressive topiaries are made and stored for the event.

4. Inn on the Square
The Inn on the Square is a charming boutique hotel in the heart of Greenwood. The historic building has been beautifully renovated and decorated and is worth checking out …and checking in!
5. Good Times Brewing at The Mill House
Good Times Brewing at the Mill House brews their own craft beers and bakes specialty pizzas in a brick oven.

6. Emerald Farm
Emerald Farm is a fun, beautiful, working dairy farm that makes goat milk soaps and other health-related products. Meet the goats, shop in the store, and check out one of the largest model train displays you’ll ever see!

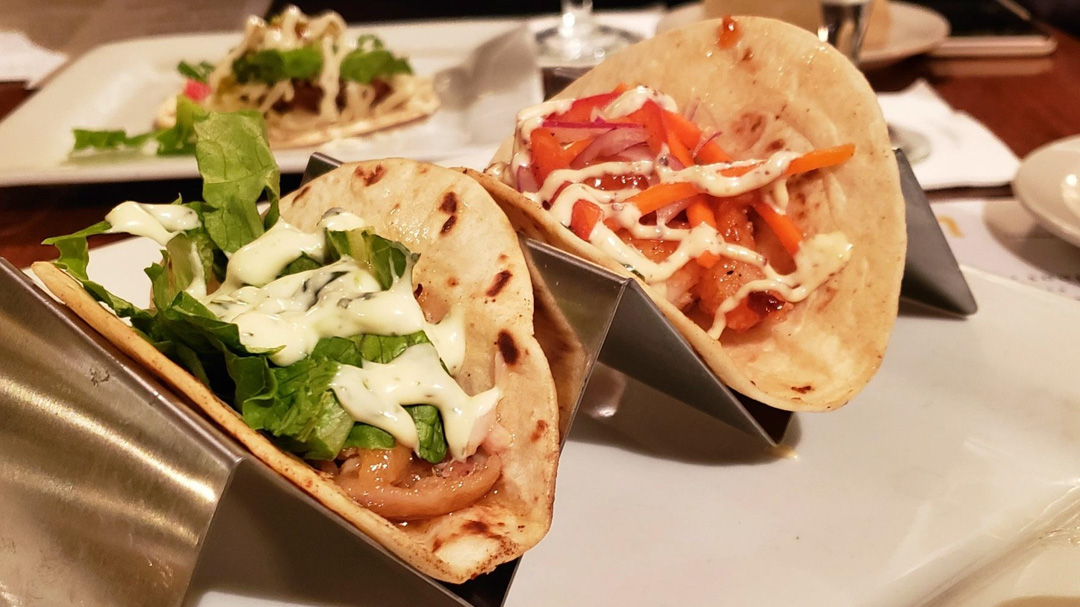
7. Montague’s Restaurant
One of Greenwood’s most popular restaurants, Montague’s Restaurant offers farm-to-table
8. Dr. Benjamin E. Mays Historic Site
The Dr. Benjamin E. Mays Historic Site is a part of the United States Civil Right’s Trail. Were it not for Dr. Mays, the world might not have known Dr. Martin Luther King, Jr. Visiting

9. Wild Turkey Center
The Wild Turkey Center is home to the National Wild Turkey Federation’s national headquarters and the interactive Winchester Museum. Though I’m not a hunter, I found this to be a fascinating stop. The museum chronicles the comeback story of wild turkey and has an impressive display of taxidermy, turkey calls, and wildlife oddities.

10. Palmetto Shooting Complex
Take aim and hone your hunting skills at the Palmetto Shooting Complex. Located just around the corner from the Wild Turkey Center, the complex houses two clay courses, five trap and skeet fields, and a 9,300 square-foot pavilion.

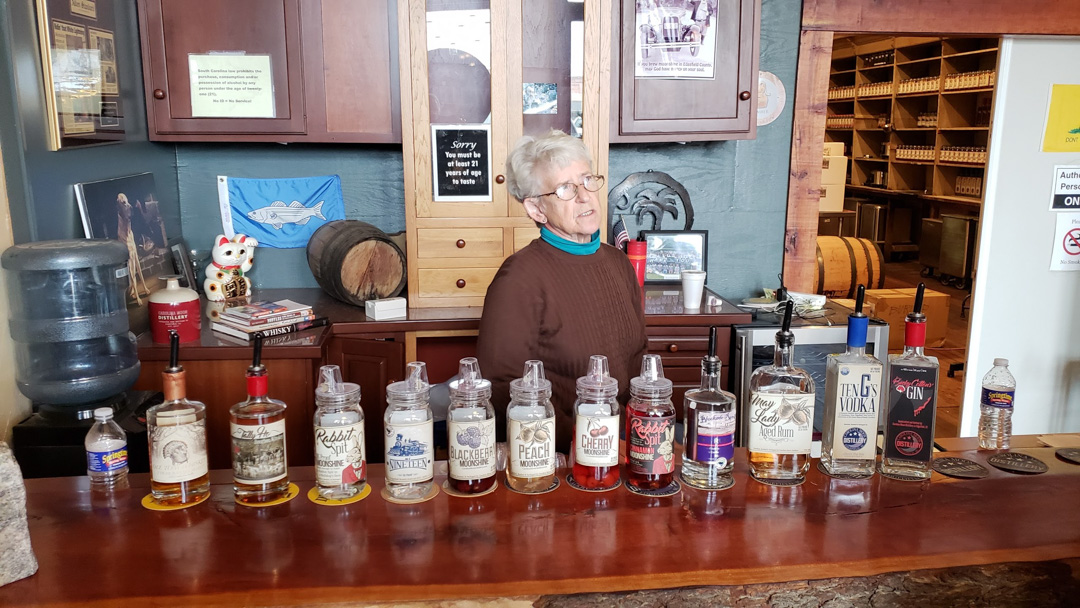
11. Carolina Moon Distillery
Located on the square in Edgefield, the Carolina Moon Distillery is a popular stop on the Old 96 Quench Your Thirst Tour. Stop by and sample whiskey, moonshine, rum, and other spirits crafted at the distillery. Better yet, purchase some to take home with you!
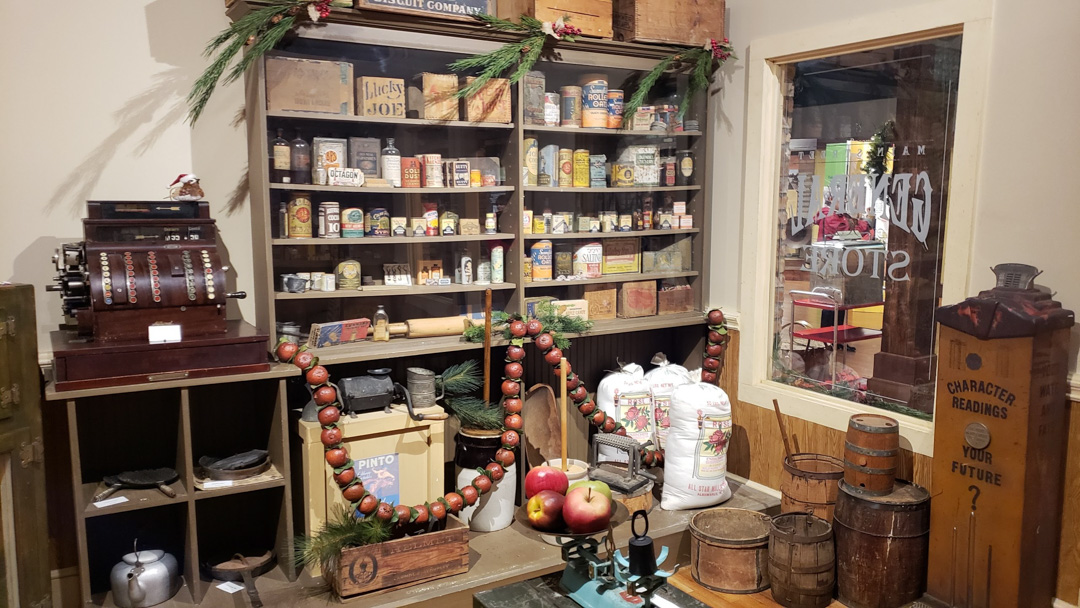
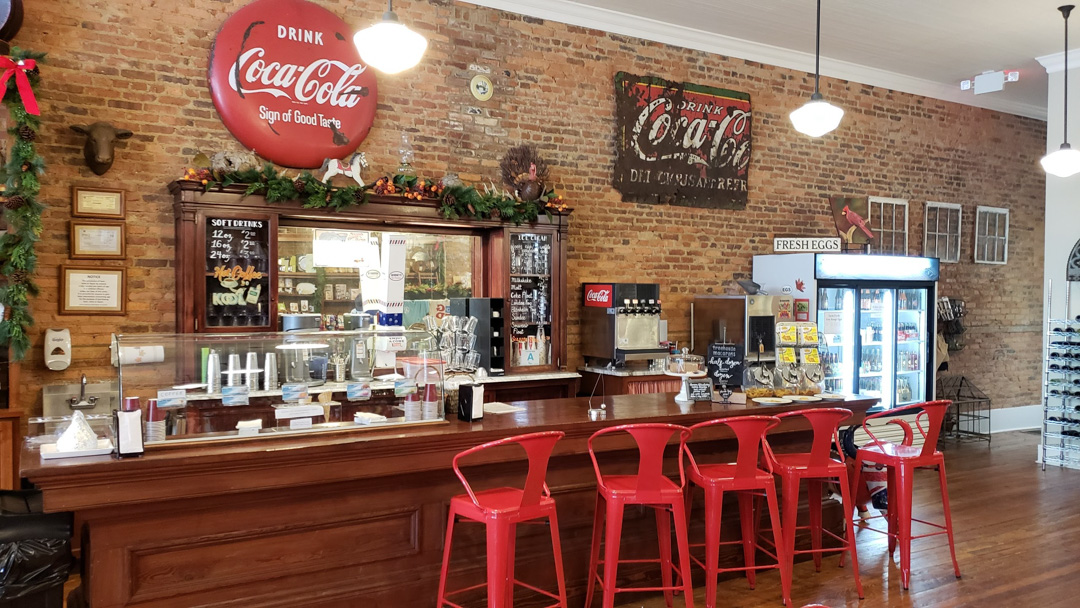
12. Edgefield General Store
If you’re feeling nostalgic for soda fountains, hand-dipped ice-cream, milkshakes, and fountain drinks, head across the square to the Edgefield General Store. The store also sells beer, wine, candy, general merchandise, and unique gifts in a cool retro setting,
13. Old Edgefield Pottery
Edgefield has been known for its production of pottery stoneware for over 200 years. Old Edgefield Pottery is both a working studio and a museum that houses 19th and 20th century Edgefield pottery. Master Potter, Justin Guy is not only a gifted craftsman,

14. Pleasant Lane Acres Bed and Breakfast
The Pleasant Lane Acres Bed and Breakfast is a beautifully restored 1860’s farmhouse that offers a perfect escape for a little R&R. You can swing on the porch, sit by the fire, take a stroll around the pond, and enjoy some of the most delightful gourmet food you’ll ever experience.

What are some of your best off the beaten path experiences in your travels?


Meet the Pepper People, the condiment creators who know how to spice up any dish!
We got to visit with some of the hottest people on the planet at Zest Fest in Irving, Texas at the intersection of pain and pleasure. Meet the Pepper People, the condiment creators who know how to spice up any dish!

Family Friendly Breaded Chicken Breast Fillets
 Breaded chicken breast fillets are a fast and flavorful family friendly dinner fix. I’ve paired it with a mustard caper sauce that was inspired by my travels to Germany where I fell in love with schnitzel.
The beauty of a Sanderson Farms thinly sliced, boneless, skinless breast fillets is 1) They are hand-trimmed and 99% fat-free 2) Most people including my finicky kids love them 3) They are fast, ready in less than 30 minutes from start to finish 4) They can be personalized to individualized palates by adding sauces and dips. Skinless breast fillets can be paired with a simple classic red sauce for an italian flair, BBQ sauce for kid friendly dipping, a ‘companies coming’ mushroom cream sauce, or my mustard caper sauce (recipe below).
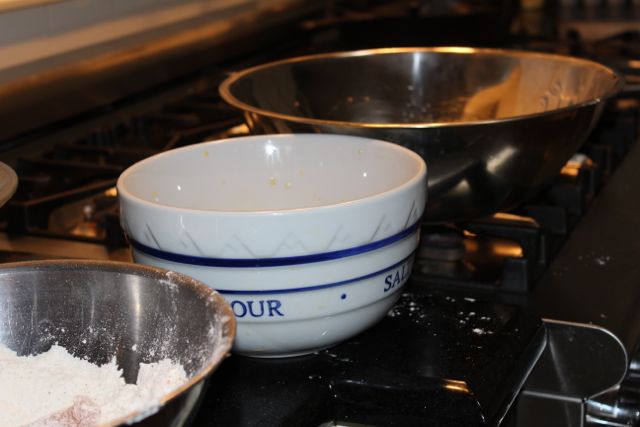
INGREDIENTS
- 4-Sanderson Farms thinly sliced, boneless, skinless breast fillets
- 1 cup all purpose flour
- 1 1/2 cups Panko bread crumbs
- 2 eggs
- 1/2 cup grape seed oil
- Salt and Pepper to taste
- 2 tablespoons garlic powder
- 3 tablespoons capers
- 2 tablespoons Dijon mustard
- 4 tablespoons unsalted butter
- 3/4 cup of chicken stock
- 1 tablespoon cornstarch for thickening
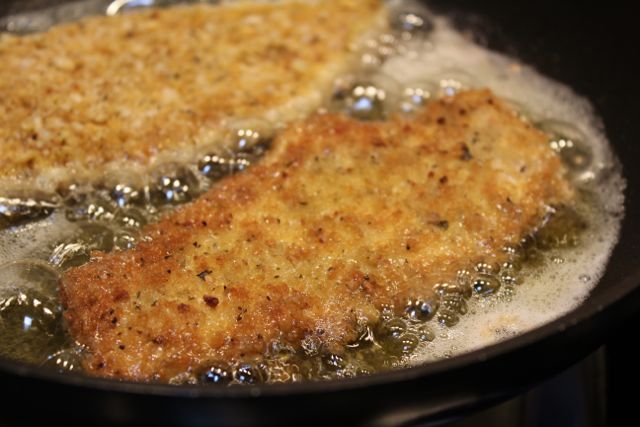
INSTRUCTIONS:
Cutlets
Mustard Caper Sauce

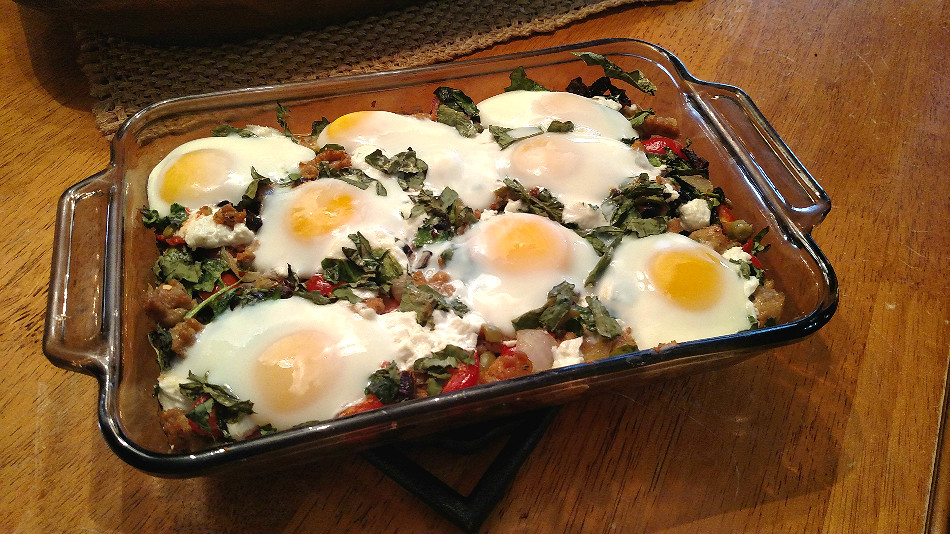
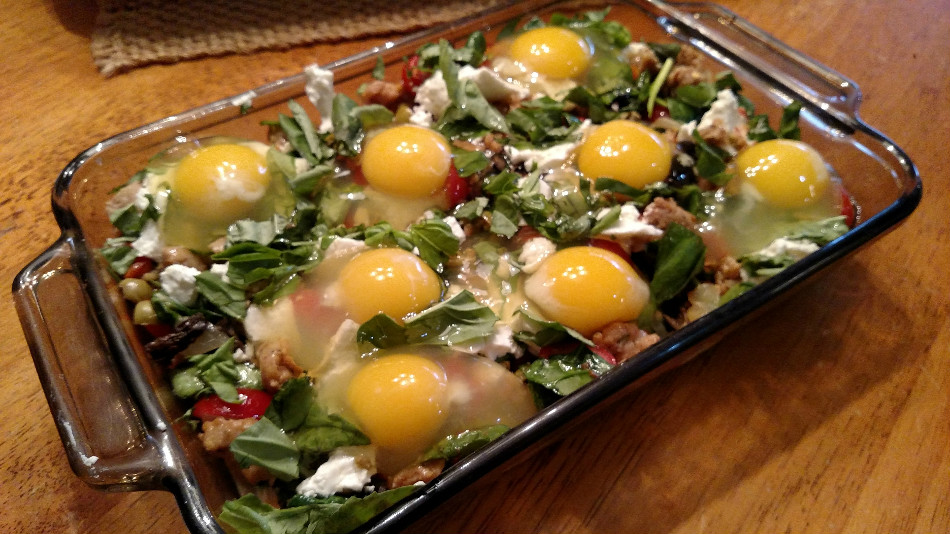
Travel Inspired #Recipe Eggs Gargano
Travel is inspiring in so many amazing ways. One of our favorite inspirations comes in the form recreating dishes for family and friends that remind us of destinations we have visited. This all-in-one breakfast dish we’ll call “Eggs Gargano” was inspired by a trip Rick took to Gargano, Italy.
Ingredients:
Olive oil
1 lb Italian Sausage
1 medium onion (diced)
1 jar green olives (diced)
1 jar black olives diced)
1 handful of sun-dried tomatoes – chopped
2 handfuls of grape tomatoes / halved
1 handful of baby spinach – chopped
6 leaves of fresh basil – chopped
8 globs of goat cheese
8 chicken eggs
Directions:
Brown the Italian Sausage, with onion and olives in some olive oil on the stove top (medium high heat).
Once the sausage is brown, reduce to simmer and stir in the tomatoes, sun-dried tomatoes, and spinach. Cook until the spinach wilts (about 1 minute)
Transfer the cooked stuff into a baking dish
Evenly disperse 8 globs of goat cheese
Sprinkle basil over the top of the pan
Evenly Disperse 8 whole eggs (without the shell) over the top of the dish
Bake at 300 until the eggs turn white
Let it rest for a few minutes and serve over slices of toasted baguette
Toasted Baguette:
Slice baguette
infuse olive oil with fresh sage
add equal part of melted butter
dip one side of each slice of bread into the warm sage infused olive oil & butter mixture
Bake at 300 to desired level of toastiness 🙂
Here are a few photos from Rick’s trip to Gargano, Italy.


Have any of your travels inspired any of your dishes?

Behind the Scenes ~ South Beach Wine & Food Festival #sobewff

Wine, food and celebrities – what more could you want? The South Beach Wine and Food Festival is like Spring Break for adults. We got to sample the creations from some of the best known chefs in the world!
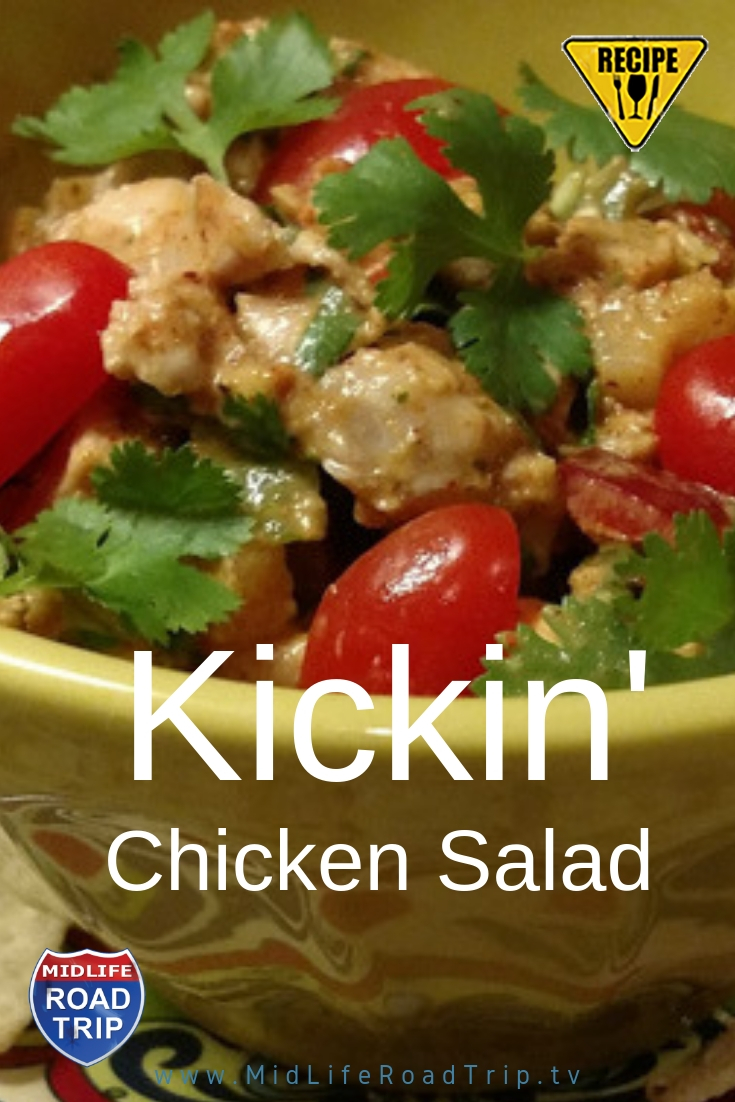
Kickin’ Chicken Salad
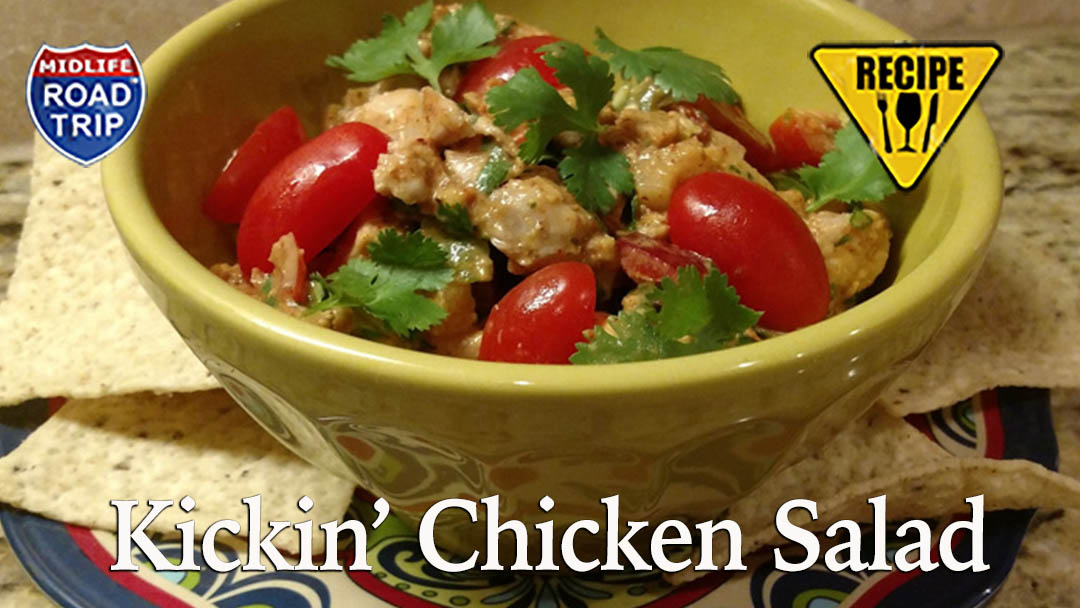
I could probably eat chicken salad every day. It’s good, it’s healthy, and it’s easy to make. But as someone likes to bite food that bites me back, traditional chicken salad recipes don’t feed my need for heat. So after a bit of experimentation, I finally hit on a Kickin’ Chicken Salad Recipe that has become my go-to chicken salad.
WARNING: Not for Wussies
If you’re sensitive to heat, just cut back on the hot ingredients or eliminate them altogether and you’ll still have a unique, great tasting chicken salad.
Ingredients
- 3 boneless skinless chicken thighs
- 3 fresh jalapeños (diced)
- 1/4 cup fresh chopped cilantro
- 1/2 cup diced grape tomatoes
- 1/2 diced onion
- 1 soft, ripe avocado
- 2 tablespoons mayonnaise
- 2oz lime juice
- 2 teaspoons chili powder
- 1/4 teaspoon cayenne pepper
- 1/2 teaspoon paprika
- 2 tablespoons honey
- salt & pepper
Directions
- Bring water to a boil in a 6-quart pot.
- Add chicken and continue boiling for approximately 5 minutes.
- Reduce heat and simmer the chicken for approximately 10 minutes or until the chicken reaches an internal temperature of 165°F. Let cool and dice.
- In a mixing bowl, combine the avocado, mayonnaise, chili powder, cayenne pepper, paprika, honey, and lime juice. Whisk thoroughly.
- Add diced chicken thighs, jalapeños, grape tomatoes, onion, and cilantro to the mixing bowl. Toss and stir until all ingredients are thoroughly coated.
- Add salt and pepper to taste.
- Garnish with grape tomatoes and cilantro
- Chill and serve.
What’s your favorite way to prepare chicken salad?

Buffalo Chicken Milkshake
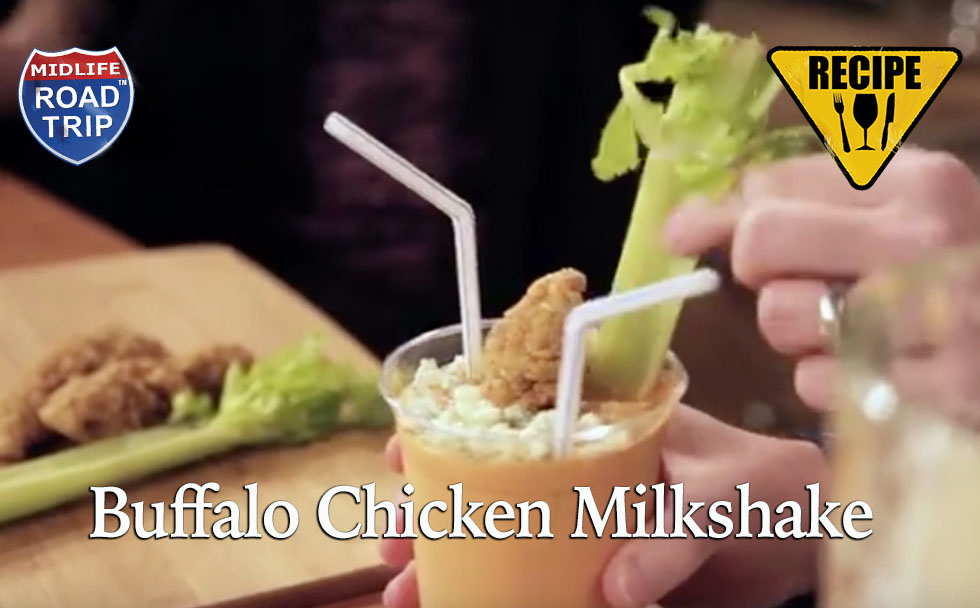
Here’s something sure to “shake up” your next party – the Buffalo Chicken Milkshake as seen on 30 Rock. It’s different, it’s easy, it’s quirky and … it’s delicious! Special thanks to our friend Monica Sanford for bringing this fun video with step by step instructions to our attention.
 7
7

Bucket List! Eating Key Lime Pie in Key West
 The final port of call for our fabulous Holland America cruise aboard the Nieuw Amsterdam was Key West Florida where we got to check “Eating Key Lime Pie in Key West” off our Bucket List ! We asked around and the locals told us that Kermit’s Key Lime Shoppe was THE place to go so we did. Not only did we get to fast some of the best key lime pie on the planet, we got to meet the famous Key Lime Kermit, himself! Check out the video below!
It’s a Great Time to Get Naked! #wine

The Naked Grape pinot grigio has slight flavors of citrus, pear and honey. At only $9 a bottle, it’s a great time to get naked! 🙂
Pinot grigio is a great every day wine. One of the things I love about pinot grigio wines is that they tend to be light, and crisp and pair with almost anything. It may not be the absolute best choice for every meal, but for me it’s not a bad choice for any meal.
I like to drink by itself, with a meal or with a snack. In fact, pinot grigio is my favorite wine to pair with popcorn.
Alcohol Level: 12.9%
Suggested Retail Price: $9
Disclosure: I’m not a sommelier or even a wine snob. I’m just a regular guy who loves wine. I frequently participate in food and wine chats on Twitter where I share what I like and I learn from others what they like. From time to time winemakers and marketers will send me a bottle of wine to review. If I like it, I’ll tweet about it and possibly even write a blog post about it. If I don’t, you’ll never see it mentioned. I am not paid to review wines. Wine is my only compensation.

Salted Caramel Thumbprint Cookies

Disclaimer: I am not a baker. So, when my Salted Caramel Thumbprint Cookies turned out, no one was more surprised than me! #SundaySupper put out the holiday cookie challenge and well you know us, we never met a challenge we wouldn’t try. After all, Midlife is about stepping out of your comfort zone and well baking from scratch is quite uncomfortable! This recipe is easy. Very Easy. The cookies are melt-in-your mouth delicious with the perfect combination of sweet from the caramel with the sprinkling of sea salt. Truly a match made in cookie heaven.
Ingredients
- 3 sticks unsalted butter at room temperature
- 1 cup sugar
- 1/2 tsp salt
- 1 1/2 teaspoons vanilla extract
- 3 1/2 cups all-purpose flour
- Approx 12-14 oz soft caramel candies
- 6 tablespoons heavy cream
- Sea salt
Directions
- The Dough: Preheat oven to 350 degrees. With a hand mixer on medium speed beat together butter and sugar until light and fluffy, add in vanilla. Turn mixer on low and slowly add in flour and 1/2 teaspoon salt and beat to together. Press dough together and then make 4 dozen 1 1/4-inch balls. Put balls on cookie sheets and press and press your thumb to make an indentation (hence the name “Thumbprint Cookie.”) Bake for about 10 minutes, removing cookie sheets from oven and re-press thumb prints. Put cookie sheets back in the oven for an additional 10 minutes until lightly browned. Remove from oven and cool on wire racks.

- The Caramel Filling: Put the caramels and heavy cream in a saucepan on low heat, continuously stirring until the caramels are melted into a smooth, creamy mixture is smooth. Spoon the warm caramel mixture into your “thumb print” in cookies. Sprinkle with sea salt. Note: If the caramel hardens before all cookies are filled just reheat on low.


As an ordained “cookie sommelier” I wanted to share some of my favorite cookie recipes from some of my blogger friends!
What’s your favorite cookie recipe?
- Turtle Thumbprint Cookies by Cravings of a Lunatic
- #glutenfree Almond Oatmeal Raisin Cookies by Cooking Underwriter
- Old-Fashioned Oatmeal Cookies by The Food Army Wife
- M & M Cookies by Damn Delicious
- Snowball Cookies by Small Wallet Big Appetite
- Mocha Thumbprint Cookies by The Meltaways
- Cardamom-Walnut Cookies by Home Cooking Memories
- Polish Chrusciki (Bow Ties) by Comfy Cuisine
- Cherry Blossom Cookies by Flour on my Face
- Rosettes by That Skinny Chick Can Bake
- Millionaire’s Shortbread by Gotta Get Baked
- Double-the-Mint Chocolate Kiss Cookies by The Weekend Gourmet
- Whole Wheat Cereal Cookies by Cindy’s Recipes and Writings
- Chocolate Dipped Potato Chip Shortbread Cookies by The Girl in the Little Red Kitchen
- Scories De Vulcan | Lava Stones Cookies by The Daily Dish Recipes
- Zimtsterne {Cinamon Stars} #Dairyfree by Galactosemia in PDX
- S’mores Cookies by Hezzi-D’s Book and Cooks
- Chocolate Whoppers by Vintage Kitchen Notes
- Ricotta Cookies with White Chocolate Glaze Country Girl in the Village
- Turtles by Dinners, Dishes and Desserts
- Salted Caramel Brownie Cookies! by I Run For Wine
- Peanut Butter Chocolate Toffee Cookies by The Urban Mrs.
- Red Velvet Crinkle Cookies by She likes ruffles, he likes truffles
- Amaretto Almond Biscotti by Noshing With The Nolands
- Mexican Chocolate Cookies by Generation Y Foodie
- Double Chocolate Peppermint Biscotti by Pippis in the Kitchen Again
- Ice Cream Kolaczki by Cookistry
- Amoniaczki by What Smells So Good?
- Fruit and Nut Ice Box Cookies by In the Kitchen with Audrey
- Ginger Bourbon Balls by girlichef
- Candy Cane Blossom Cookies by Mommas Meals
- Double Chocolate Cranberry Cookies by Lovely Pantry
- Ninja Bread Men by Diabetic Foodie
- Peppermint Sugar Cookies by In The Kitchen With KP
- Christmas Crunchies by Magnolia Days
- Cream Cheese Swirled Red Velvet Cookies by Mom’s Test Kitchen
- Double Peanut Butter Surprise Cookies and Tips on Mailing Cookies by Chocolate Moosey
- Congo Bars by Supper for a Steal
- Mint Surprise Cookies by The Cookie A Day Challenge
- Salted Caramel Thumbprint Cookies by Midlife Road Trip
- Spiced Rum Balls by Webicurean
- Best Ever Pecan Pie Bars by Shockingly Delicious
- Oreo Cheesecake Cookies by Baker Street
- Biscoff Pillow Cookies by by The Messy Baker Blog
- Mexican Hot Cocoa Cookies by Juanita’s Cocina
- Raspberry Thumbprints for my first #SundaySupper! by Kelly Bakes
- Tea Biscuits by My Cute Bride
- Chocolate Covered Cherry Cookies by Mama Mommy Mom
- Lebanese Butter Cookies for the Christmas Season by The Catholic Foodie
- Almond Joy Macaroons by Cupcakes and Kale Chips
- Gluten Free Coconut Fruit Nut Cookies by Sue’s Nutrition Buzz
- Snowball Surprises by Family Foodie

Tailgating Texas Style #TexasToDo

As a fanatical football fan and foodie it should come as no surprise that tailgating is one of my favorite activities. Mingling with fans who are as passionate about their food as the they are their football teams is worthy of any Bucket List. Though I’ve been fortunate enough to tailgate at several college football games, I had never tailgated at a NFL game. So when Texas Tourism invited me to Houston to experience tailgating Texas style, I jumped at the chance.

Houston celebrity chefs, Terrance Galvan and Seth Siegel-Gardner of The Pass and Provisions put together a Texan’s Tailgate Tour. The VIP tour included transportation to and from NRG Park, access to several of the best tailgates, a generous swag bag, and tickets to the Texans game against the New Orleans Saints.
I met the tour group at 8a.m. for transportation to the stadium and was handed a St. Arnold’s beer upon boarding The Wave. When I commented that I had never had a beer that early in the morning, the reply was, “Welcome to Texas!”

After arriving at the stadium, we made our way to Terrance and Seth’s tailgate spot in the parking lot. They lit a Weber grill and began adding ingredients to a large pot to make gumbo. While the gumbo simmered, we were guided through the parking lots adjacent to the stadium to some of the most elaborate tailgate setups imaginable. We sampled foods that you would expect to find on a dinner menu at your favorite restaurant. It was hard to believe that this food was prepared in a parking lot.
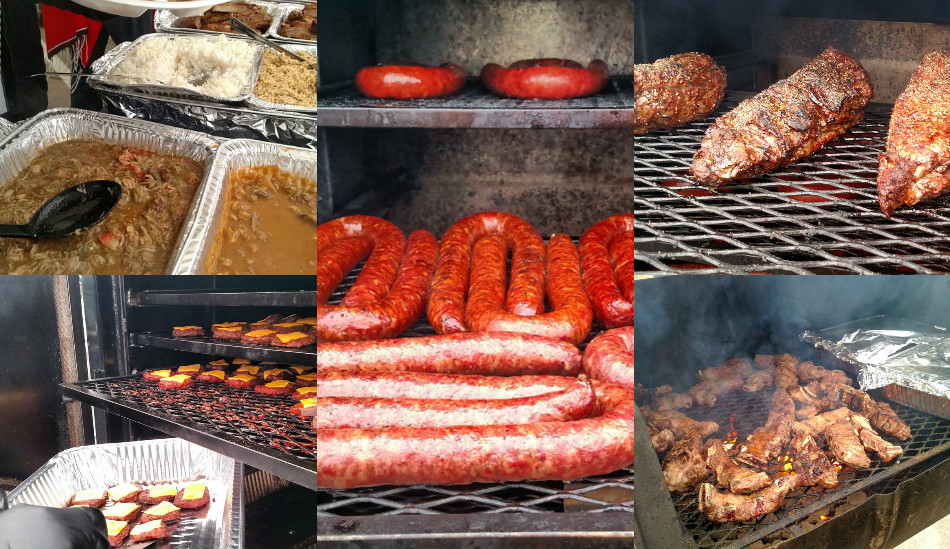
Just as my stomach was about to bust from overindulgence, we arrived back at Terrance and Seth’s tailgate spot where the large pot of gumbo was waiting for us. The smell of the roux and the sight of the sausage and extra large shrimp proved too tempting to resist. It was honestly the best gumbo I’ve ever had. I didn’t say so at the time, as a courtesy to the New Orleans fans who take great pride in their gumbo. (New Orleans used to be the best place I’d ever had gumbo.) I ate the entire bowl and had to go to the game with my pants unbuttoned. (Note to self: Wear stretchy pants next time you go tailgating in Texas.)
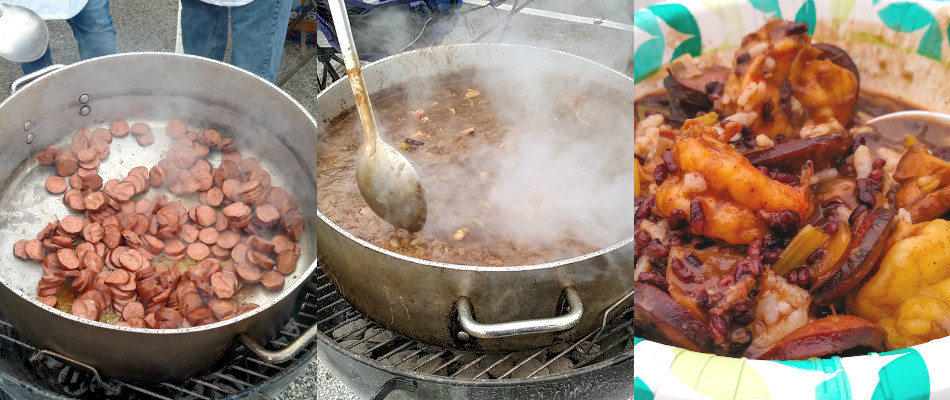
To make the day even better, the Texans won. Not that I care, I’m an Atlanta Falcons fan, but whenever the home team wins, the post game mood is always more fun.

Drinking beer and sampling incredible food always makes for a great day, but to do it in the atmosphere of thousands of Houston Texans fans in varying states of sobriety is something that one must experience to fully appreciate. Trust me – it belongs on your Bucket List!
What are some of your favorite tailgate experiences?

Sparkling Wines for Festive Times

Holiday meals at my house are kind of like a pot-luck dinner at a Sunday school picnic. Everybody prepares their favorite dish and brings enough for the whole gang share. Planning a wine for a variety of festive flavors can present a challenge, but a simple solution is to serve an extremely versatile sparkling rosé.
Sparkling rosés are ideal for meals that run the gamut. Rather than overpowering some items on your plate with a robust red, a rosé offers enough structure and body to stand up to some heavier flavors while not overpowering some more delicate dishes. The bubbles serve as read more…

Cooking Channel’s “Extra Virgin” Gabriele Corcos Gnocchi di Patate #Recipe
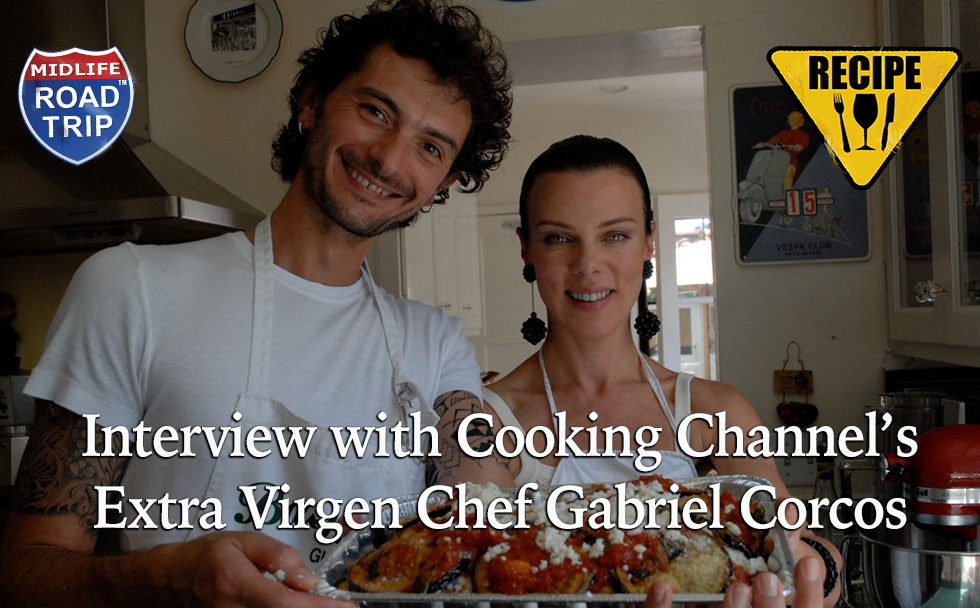 I have been a fan of cooking shows for years, since back in the day when I would have to wait for Saturday when public television would air a handful of chefs whipping up their specialties. Fast forward to 2012 and to my utter joy, 24/7 you’ll find cooking show after cooking show. One of my absolute favorites is “Extra Virgin“ hosted by husband and wife Gabriele Corcos and Debi Mazar. They are absolutely charming, entertaining and they cook up one delicious dish after another on the Cooking Channel. With a very popular cooking show, a growing product line, fabulous website ‘Under the Tuscan Gun‘, two beautiful daughters and travels that take this busy couple around the world, I asked Gabriele how it all began and what’s next.
Where/when did your love of cooking begin?
I started baking at the age of six. My mom was a school teacher, in Italy schools r open on Saturday as well, so when my brother turned 2 and I was six my mom told me: “Tomorrow is Sunday, I want to sleep, if I hear a single sound you are grounded… ” She walked me to the fridge and showed me what I was supposed to feed my brother in the morning. There were no bottle warmers at the time, so I had to use the stove to heat up his bottle… So I figured if she let me use the stove I could use the oven as well. I opened a book, baked my first cake and then served breakfast in bed to my parents at 11 am… I stuck a piece of paper on the cake, with the price… that became my weekly allowance for the next few years.
You are a musician by trade and cook by nature. How do you balance both of these passions?
It used to be a half/half situation until a few years ago… then the music industry started collapsing (at least for me). I did not want to tour anymore, did not want to come back late at night at home… the website started picking up requiring more and more attention… As much as I felt sad because I was not playing music as much as I used to, cooking has been keeping me inspired and very creative… that is very important to me. I basically only play for fun these days.
Where do you get your inspiration from when creating a meal?
Oh, this one is hard. More than inspiration is an obsession. I am constantly trying new recipes, learning as I go, reading every book I can find about traditional Tuscan cooking… but at the same time I always discover new foods and I adapt them to my own heritage. My girls are a great inspiration, making a great dinner and feeding them right is for me a priority… it is always in the back of my mind. So when I experiment new recipes I always make sure I have a back up in the freezer or fridge in case something goes wrong 😉

On your show Extra Virgin, you share the kitchen with your wife Debi Mazar. How do you blend your two distinctive cooking styles into one delicious dish after another?
I have turned Debi in a great sous chef. She knows my way in the kitchen, and together we make a great team. We explore foods together and we talk about how to make it our own. We often go to restaurants and get inspiration from new dishes or just even the menu. Then we come home and we disassemble and re-assemble whatever recipe feels interesting to us.
I love that cooking in the Corcos home is a family affair. How do you get & keep your kids involved?
To me is like telling them my family history… plus I need them to learn because I do expect them one day to cook for me… I call it my Retirement Plan. Giulia and Evelina are very interested in everything I do in the kitchen: they like to chop, stir… they like to learn how to use appliances and knives… but they don’t like to clean. They do not mind trying new foods. Giulia (the youngest) cooks with me basically every evening, since her sister is in 4th grade and has homework to do. Sometimes we get at the dinner table and she refuses to eat what she just cooked… she looks at me and says: “I made this for you, I don’t like it!”
When people think of ‘comfort food’ in the states, it’s often along the lines of mashed potatoes & meatloaf. What would be ‘comfort food’ for the Corcos house?
Pasta! Any kind, any sauce…. spaghetti are our go to item when we need comfort.
You and Debi often entertain. What is the key to creating a great dinner party?
No secret really. People know when they come to our house that this is how we roll. We never really try to impress or make anything special… Very often friends come during the week and are stunned by the way we dine on a regular day… they cannot believe that this is just our way. We always make fresh food, always have good wine, and we are always in the mood to entertain. I think the secret is not to get overwhelmed and just stay relaxed…
You not only make cooking fun, you make it look effortless. What advice do you have for someone who might be intimidated in the kitchen?
Mishaps happen. No shame in that, it is just how it is. If people feel the pressure they should start with easy items, like pasta… The most important advice I can give is to always have a back up dish like a pasta sauce in the freezer before attempting to cook something new and intimidating… if the attempt fails there is at least something else to serve for dinner.
What is the one ingredient that every pantry should have?
Good Olive Oil and Fresh Bread.
Last minute guests, what do you serve?
Pasta is always a snap!
Not only do you make great dinners, your desserts are incredible. What makes a great dessert?
I started baking when I was six, but I would not say that it is my strength. I actually find baking really limiting… it is kind of an exact science with not much room to play around… I enjoy myself much more with entrees like pastas or meats.

What’s next for Extra Virgin? Under the Tuscan Gun? and the Corcos’?
We are waiting to hear from Cooking Channel if another season is ordered. We are confident that it will happen, but we are not jumping the gun… sitting on our hands, a bit anxious… but in the meantime I have been developing tons of recipes and we started finally working on a book. As far as the website we have about 20 new contributors that will be writing this coming year, I hope to be able to find some financing to turn it into a real e-zine… my hope is to become a serious point of reference for people interested about good food and healthy lifestyle… as far as the Corcos: we got a new puppy this Xmas… it’s like having an infant in the house. Potty training is a bitch and we are sleeping like crap!!!

GNOCCHI DI PATATE
Serves – 8 / Prep Time – 1 1/2 hour / Cook Time – about 3 min- 10.5 oz. (300 gr) all purpose flower
- 2.2 lb. (1 Kg) old “starchy” potatoes
- 1 large high-quality organic egg
- 1 tsp of salt
BUTTER AND SAGE SAUCE
- Serves – 8 / Prep Time – 5 min / Cook Time – 10 min
- 5 Tbsp of butter
- 2 handfuls of sage
- Salt and Pepper
CREAMY MUSHROOM SAUCE
- Serves – 8 / Prep Time – 10 / Cook Time – 2o
- 1 cup of mushrooms (portobello or porcini)
- 12 oz. of pelati (peeled tomatoes)
- 1 shallot or 1/2 yellow onion
- 1 handful of fresh mint
- 1 handful of fresh thyme
- 1 handful of fresh parsley
- 2 tbs of butter
- 1/4 cup of heavy cream
- 5 tbs of Olive Oil
- Salt and Pepper
- Grated Parmesan for Dressing
- Wipe clean your mushrooms with a damp cloth and pat dry them, never ever wash or scrub them, as you will kill most of the flavor by doing that.
- Slice them thin and, in a large non-stick pan, saute’ them in about 3 tablespoons of olive oil for about 10 minutes, then add the fresh herbs and cook for another 5 minutes and set aside.
- Chop the shallots and the parsley very fine. Saute’ the shallots in 2 tablespoons of olive oil in a large skillet, then add the pelati, season with salt and pepper and cook for about 15 minutes, until the sauce is visibly reduced.
- Melt the butter into the sauce, add the cream and stir well, before adding the mushrooms and mixing finally all the ingredients together.
- After cooking on a low flame for about 10 minutes,your sauce is now ready to dress you gnocchi… or any other kind of pasta you’d like, for that matter.
- Serve dressed with a sprinkle of chopped parsley and a generous tablespoon of grated Parmigiano.
Buon Appetito.
Debi and Gabriele

Chocolate Chip Cranberry Cookies Recipe from Rancho La Puerta

Chocolate Chip–Cranberry Cookies
By Deborah Szekely and Deborah Schneider with Chef Jesús González of La Cocina Que Canta
Friday is eagerly anticipated Cookie Day at the Ranch. The lucky staff member who walks around with the basket, handing out cookie bliss, is the recipient of many a heartfelt ¡gracias! Who wouldn’t be happy? Each chocolate chip cranberry cookie is packed with tart cranberries and chewy, crisp oats and has a fat chocolate beso in the middle. Although made with healthy grains, these are real cookies, so keep them small and enjoy in moderation.
Ingredients (makes 4 dozen)
- 1 cup unsalted butter, softened
- ½ cup firmly packed brown sugar
- 2 eggs
- 1 cup milk
- 2 cups rolled oats
- 1 cup wheat germ
- 1 cup wheat flake cereal
- 1 cup white whole-wheat flour or whole-wheat pastry flour
- 1 cup sliced almonds
- 1 teaspoon cinnamon
- 1 teaspoon baking powder
- ½ teaspoon baking soda
- 1 cup semisweet chocolate chips
- ½ cup dried cranberries, chopped
- Chocolate kisses, unwrapped
Directions
- Preheat the oven to 350 degrees F.
- In a stand mixer fitted with the paddle attachment, cream the butter and brown sugar. Add the eggs one at a time, then the milk, beating until combined. (The milk will not quite combine with the butter or the mixture will look a little separated, but this is fine.)
- In a separate bowl, combine the oats, wheat germ, cereal, pastry flour, almonds, cinnamon, baking powder, and baking soda. Add the chocolate chips and cranberries.
- Add oat mixture to the milk mixture, and mix on the lowest speed until thoroughly combined. Use a tablespoon measure or small ice cream scoop to scoop the dough onto lightly oiled baking sheets, leaving 2 inches between each scoop. Press a chocolate kiss into the center of each cookie. Bake for 14 minutes, or until lightly browned.

Meet Annette Starbuck, Goodie Girl and Winner of Food Network’s ‘Cupcake Wars’ #Recipes

Annette Starbuck, the multi-Award Winning Founder of Goodie Girls and Winner of Food Network’s ‘Cupcake Wars’, has a joyous passion for creating a variety of baked delights. Even though Annette never actually enrolled into any institutional Culinary Programs or attended Culinary School, she’s achieved acclaimed success through her seasoned personal experience and pure creative determination. She was gracious enough to share her story AND two of her mouthwatering cupcake recipes with us.
MLRT: How did The Goodie Girls get started? –
MLRT: Who inspires you & why?
MLRT: What is YOUR favorite cupcake and why?
MLRT: You won Food Network’s Cupcake Wars! What’s the best thing you learned from that experience?
MLRT:What tips do you have for budding chefs/bakers who are new to social media?
MLRT: We’re all about exploring new places, people & foods. What’s on YOUR bucket list?
Peaches ‘N Cream Cupcakes
Ingredients:
Cupcakes
- 1 1/3 cups all-purpose flour
- 1/2 teaspoon baking powder
- 1/2 teaspoon baking soda
- 1/4 teaspoon salt
- 1 cup sugar
- 4 tablespoons butter, at room temperature
- 1 large egg
- 1 teaspoon vanilla extract
- 1/2 teaspoon peach extract
- 3/4 cup buttermilk
- 1/4 cup peach puree
Filling
- 2 cups fresh or frozen peaches, pureed
- 1 tablespoon sugar
- 1 tablespoon cornstarch
Mascarpone Frosting
- 1 pound mascarpone cheese
- 1 1/4 cups heavy cream
- 1/2 cup confectioners’ sugar
Directions:
- For the cupcakes: Preheat the oven to 350 degrees F.
- Place 12 liners in a cupcake pan.
- In a medium bowl, whisk together the flour, baking powder, baking soda and salt. In a large bowl, beat the sugar and butter together using an electric mixer until it looks creamy.
- Beat in the egg, vanilla extract and peach extract until the mixture is smooth.
- Add half of the flour mixture to the butter mixture and stir until almost combined. Add the buttermilk and peach puree and stir again until almost combined.
- Add the rest of the flour and stir until all the ingredients are mixed in.
- Fill the cupcake liners with batter using a large ice cream scoop.
- Bake for 18 to 20 minutes.
- Cool for 10 minutes before removing from the pans. Place on a wire rack and cool completely.
For the filling:
- Place small saucepan on the stovetop and put on medium heat.
- Put the peaches and sugar in and bring to slight boil.
- In a separate small bowl, mix the cornstarch and 1 tablespoon water until no lumps.
- Add the cornstarch mixture to the pan and keep on medium-low heat for about 1 minute.
- Cool completely before use. Yield: about 1 1/2 cups.
For the frosting:
- Put the mascarpone, cream and confectioners’ sugar in a stand mixer with the paddle attachment.
- Beat on medium speed until thick, 4 to 5 minutes. Yield: about 2 cups.
- Fill the cupcakes with the peach filling and then frost with the mascarpone frosting.

Mint Julep Cupcakes
Cupcake Ingredients:
- 1 cup butter
- 2 cups sugar
- 1 teaspoons vanilla extract
- ¼ teaspoon mint extract
- 4 eggs
- 2 3/4 cups flour
- 3 teaspoons baking powder
- 1 teaspoon salt
- 1 cup milk
- 3/4 cup bourbon (or whiskey)
- 1/4 cup clear Crème de Menthe
Bourbon and Mint Frosting Ingredients:
- 1 Cup Butter – Room Temperature
- 1/3 cup Bourbon (or whiskey)
- ¼ cup Green Crème de Menthe
- Dash of Salt
- 4 cups Powdered Sugar
Extra Ingredients:
- A little extra Bourbon for Soaking
- Fresh Mint for Garnish (or a chocolate mint)
Directions:
Cupcakes:
- Pre-heat oven to 350 Degrees (F). Place 36 liners in a cupcake pans.
- Whisk salt, baking powder, and 1 3/4 cups of the flour.
- Cream butter, sugar, eggs, and extracts in a large mixing bowl until creamy (make sure to scrape down the sides of the bowl).
- Gradually beat in the flour mixture.
- Add the milk and liquors to the batter, then the rest of the flour (1 cup).
- Mix as little as possible until the batter comes together.
- Fill paper lined cupcake pan with large ice cream scoop.
- Bake at 350 degrees (F) for 18 to 20 minutes.
- Cool for 10 minutes before removing from pans.
- Place on wire rack and cool completely before frosting.
- When cooled and before frosting, brush extra bourbon over the tops of all cupcakes to give a little added kick of bourbon.
Bourbon and Mint Frosting:
- With paddle attachment, cream butter until smooth.
- Add salt and 2 cups powdered sugar.
- Slowly beat in until smooth, add Bourbon and Crème de Menthe and mix on low speed.
- Add remaining sugar until smooth.
- Adjust sugar for consistency variances depending on desired outcome of frosting.
- Frost.
- Garnish with fresh mint leaf or chocolate mint mold.
- I also like to add a little green disco dust to make it glitter!

Making Burgers at Sea at Guy’s Burger Joint
Making Burgers at Sea at Guy’s Burger Joint
 Carnival Cruise Lines conspired with Food Network megastar, Guy Fieri, to open an instantly addictive eatery called Guy’s Burger Joint on the lido deck of the Carnival Sunshine. Though many cruisers just ask for a plain burger and some fries before heading over to the radical toppings bar where they create their idea of the perfect burger, there is a menu of Guy’s signature burgers that should not be ignored. During our recent Mediterranean cruise, Rick had the opportunity to go behind the scenes of Guy’s Burger Joint and learn what goes in to making the enormously popular burger called “The Ringer” featuring Guy’s famous “Donkey Sauce.” WARNING: This video climaxes with an intense foodgasm.
What’s the best burger you’ve ever eaten?

Hanging with Celebs at the Bertolli Party during Fashion Week, NYC

A behind-the-scenes look at the Bertolli Party during Fashion Week in New York City, where we got to rub elbows with celebrity chef Rocco DiSpirito, fashion designer Zach Posen, actress Claire Danes and more!

America’s Most Famous BBQ Joint